Tuesday, December 6, 2022

Easy Tee With A Nancy Cowl

Do you ever buy a pattern because there’s a specific part of it you want and you never bother to notice the other parts?  I do this more than I realized and I’ve discovered it because I’ve made a few things recently that I thought I was going to have to mash patterns together or finagle something and then after asking around, it turns out some of the patterns I have already do this!  This is exactly the case with my Halifax Hoodie/Brunswick mash last month.

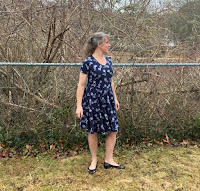
I’ve been itching to make a winter dress from some thermal fabric but I wanted a turtleneck/cowl type of neck.  My first outrageous idea was going to use 3 patterns, from 3 completely different designers.  It was going to be an undertaking but I thought it needed to happen.  I was going to use the cowl from Nancy Raglan from 5outof4 patterns (affiliate link) and stick it on a t-shirt neckline from someone else, with a dress length from someone else.

Somewhere along the way, I looked at the Easy Tee (affiliate link) and realized- there’s a dress already drawn out!  I completely forgot about the top, tunic and dress lengths of that pattern because when I made it the first time, I only cared about the t-shirt.  This took 2 patterns I was going to use and made them one.  And I was happy to see that the dress was draw with a wider A line than the other one I was going to use, so that was even better!

The Easy Tee (affiliate link) has a hood, but a hood isn’t where I was going for what I had in mind.  I remember seeing a dress once that had a great turtleneck that was full like a cowl (not skinny right to the neck) but didn’t dip down like a cowl. Do you think I can find anything like that now, even with the amazingness that is a google search?

Side note.  I made a Halifax Hoodie from Hey June once in a quilted fabric that was amazing until I did the cowl and it was such a thick fabric, it was like a giant neck brace.  I couldn’t make it dip, there was no folding or fluffing, it was just inches of a cone standing up around my neck.  I thought  it would be so pretty and holiday like with the off white and gold.  I don’t even want to talk about what I did to try to cut it down a little and wrestle it into submission.  It has moved along to an unsuspecting person through the donation box.

Back to the matter at hand.  I was slightly afraid that this thermal fabric might end up recreating the cone of despair just mentioned.  I have a Jalie pattern with a turtleneck that I didn’t even look at because I know is a close fitting neck.  The Nancy cowl (affiliate link) seemed a little floppy for the fabric but time was marching on and I didn’t want to keep looking for a neck I might have just made up in my head.  I figured it all else failed, I’d have yet another cowl in my lineup.  I like them, they are fine, I just don’t want to be that weirdo who only has one style all winter.

One thing I like about knits is how easy it is to mold them into what you want.  I knew if the Nancy (affiliate link) didn’t quite fit the top of the Easy Tee neckline, I could wiggle them enough to get them to line up.  I could have measured the neckline and the cowl bottom but alas, I did not.

One of the things I do not like about knits is how stretchy they can be and can easily get out of control.  This waffle/thermal fabric is nice but my serger made it grown by leaps and bounds, even when I adjusted the differential.  I ended up sewing it all on my regular machine with the walking foot, but not before I had managed to stretch the neckline of the tee from crew neck to practically boat neck.  Just handling the fabric was like adding water to a dried sponge.  It just kept growing.  The bottom of the cowl is a lot wider than it should have been due to the super stretched neckline.

I foolishly thought topstitching the cowl was going to do something.  I don’t even know what I thought it would do.  Keep things under control, I guess.  What it ended up doing was stretching and rippling it so much that even once I had removed the topstitching (black thread on black thermal- please sends your words of comfort) and washed it and dried it, the ripples are forever.

The neckline sort of does what I envisioned.  I played with it as I wore it and got it to a state that I like.  It’s not quite as cowl-like as the pattern intends but also a little more cowl-like than my imagination had hoped. If I made another, I think if I brought the top of the cowl piece in a little bit, it would allow it to old a little closer to the neck.  The line drawing has it tipped out a little at the top which is what allows the finished cowl to do that dip.  These are the kinds of things I can only understand by doing it and seeing the result.  I tried to imagine how that shape played out in the finished cowl but only now do I understand.  I have a very hard time envisioning 3D without holding it in my hand.

The dress itself is super easy.  Just a front and back and the sleeves.  The sleeves are not side specific so again, really each because you don’t have to keep track of which one goes where.  I ended up putting cuffs on my sleeves because with the tendency for this fabric to grow, I knew that even hemmed, these sleeves would end up a mile wide by the end of the day.  The cuffs slow that down a little bit.  I also like a longer sleeve because nothing bothers me more than a sleeve that is too short as I reach my hands forward.  I’d rather have a little extra fabric than not enough.

For the hem, I used a hem tape before topstitching.  I usually don’t like a hem tape, but I couldn’t imagine ironing and pinning  a good hem without it being 6 miles long.  That was definitely the best solution because it lays exactly as I wanted it to.

The Easy Tee (affiliate link) has a great cut that’s flattering but not too loose or too tight.  I’ve made a couple of t-shirts with the short sleeve option but this was the first long sleeve or dress that I made.  I would try another turtleneck or cowl neck on this pattern because if I had fabric that behaved better, I think I could achieve the look I originally started out wanting.
This Easy Tee and Nancy mashup were my ambassador make for 5outof4 patterns for this month.  Get your copy of each pattern here (affiliate link)!

Monday, October 10, 2022

Halifax Hoodie Sweater Jacket Hack With A Brunswick Flair

I’ve had an idea for a sweater jacket since I saw this advertised last year.  I really wanted there to be a pattern already drafted that had all of these pieces so I wouldn’t have to hack my way to what I wanted.  I searched, asked in some groups I’m in and asked all of instagram and no one shared the perfect pattern.  Lots of people suggested using various patterns and adding what I wanted.

I sat on this project for a really long time.  If you don’t have time to read to the end, I got exactly what I wanted and it’s possibly one of my proudest makes.  

Be prepared for all the details and lots of pictures.

I bought this amazing 100% cotton knit fabric after my sister gave me a gift card to www.knitfabric.com for Christmas.  Then I was so afraid to cut it.  I needed to find the PERFECT style and get the fit right before I would even consider using the real stuff.

And then summer came and I let it go. I thought maybe I’d give up on the idea of making this kind of jacket and something else would demand to be made from the navy knit I was salivating over.  When it’s super hot in the summer, it’s really hard to think about sewing cold weather clothes and hacking patterns.  But about a month ago, the nagging started again in my head and I knew if I didn’t do it now, I’d never have something ready for cold weather.

I’m a fan of Hey June patterns and love the Halifax Hoodie.  I’m not much of a sweatshirt wearer so my two Halifaxes will probably get me pretty far.  Someone suggested using that as a base and maybe the Brunswick for the side vents.  

In my searching, many of the patterns people suggested had a dropped or dolman sleeve.  For what I wanted, I knew that sleeve style wasn't going to work.  I originally started with the Halifax because of the sleeve.

It wasn’t until I sat down to really tackle this that I even noticed version C of the Halifax is a zippered sweatshirt!  I couldn’t believe the good luck I stumbled upon because I knew I could finagle a button placket out of that and it already has the hood!  I didn’t want the kangaroo pocket or the band but I did want a curved hem, so I had to think about that how to achieve that curved hem. 


And THEN, I almost wet my pants with glee when I realized view E has a curved hem!  If there was ever a pattern I was meant to hack, this one is the clear winner because almost all of the parts are there!  Little did I realize that the back of E actually comes around the sides to give those angled lines but in the long run, and that part was a very long process, it actually helped give me the swing I wanted in the back!

I couldn’t use the E Front because I didn’t want lines to go like that, so I had to ask my sibling expert how to make the C front work with the E back because the armscyes are  quite different.  My first muslin had a funky thing happen at the bust and armpit but I think we got it straightened out for the final!

What did people do before text messages and facetime?  I know I could not sew like I do if I didn't have either of these ways to get help, ideas or just confirmation that I'm doing it the right way!

I added a little bit at the front on both sides because I wanted to fold the fabric under to make a nice solid button placket.  View C is meant for a zipper and I hadn’t made it so I wasn’t sure if there was enough room to do my folding and not make it snug.  I intend to wear this as far into winter as I can, so I need it to fit over clothes.  I added interfacing to both sides as I folded them under so my buttonholes would be secure and I also like to have it on the side where the buttons sit since they will get a lot of action and I wanted them to be secure.

Just look at this curved hem.  I used the tutorial for the side vents from the Brunswick pullover and somehow, the measurements worked perfectly.  I haven’t made a Brunswick and I don’t know anything about the sizing.  I’m going to chalk that up to the fact that both are Hey June designs and she’s just magical.  

There is something to be said about using patterns from the same designer.  I have found that my favorite designers usually have patterns that end up lending themselves to being blended together pretty easily.  I know a side vent is probably a pretty easy hack to add to any sweathirt pattern, and until this jacket, it wasn't ever a feature I'd considered.  I feel like side vents with buttons are well suited to tall people with long torsos and have no torso or height.  I thought it would be silly on me.  

I was so wrong.

The last time I made a coat, the arms ended up too snug so I thought about that a lot going into this.  I knew I needed to line this and it’s a knit so it would give more than my coat did, but the shoulder and armscye were still a big worry for me.  I ended up doing a large in the front and back with a medium for the sleeves and I’m surprised it worked out so well. In the hoodie, I do a straight medium and it’s great for a sweatshirt.  I knew I wanted a little more room for this to be wearable as we head into winter.

I lined it with a cotton knit with just a little stretch and I think it’s helping everything stay in shape.  This jacket is really heavy and I think it could easily run away, but the lining and the binding of some of the seams are keeping a lid on everything.  I thought I was going to make the outside, make the lining and then sewing them together and have it all clean with no showing seams.  I realized right away this would be more work than I wanted to do and the fabrics stuck together really well so I wasn't going to lose the lining fabric if I tried to use them together as one piece.  My initial plan was to bind all of my seams but that got unwieldy at the armscye, so the hood and hems are all I ended up binding because that's all you'll really see anyway.

The hood is lined too.  I’ll never wear the hood up but I love the look of the hood when it’s down. I debated putting a channel for ties for the hood but decided it isn’t worth it and I like the cleaner look without the ties hanging down. 

The only thing missing is pockets.  I couldn’t figure out where I’d put them with the side vents being kind of where I’d want pockets.  I’m ok with no pockets. I don’t really put things in my pockets but I like to place my hands there.  I can just hook my thumbs in the side vents😂

You might be wondering how well this fabric plus the liner moved through my machines.  One serger needle broken, one jeans needle broken and two machines almost thrown in the trash because of buttonholes, but we’re good.  My Bernina 350 has an automatic buttonhole but the foot wouldn’t move properly over this fabric so I had to go back to my Bernina 1001 and do it the manual way.  I wasn’t pleased because there are A LOT of buttonholes.


I knew buttonholes would be tricky but the trickiest thing was the navy blue with the perfectly matching navy thread.  Great idea for final product but a nightmare when trying to rip out thread or just trying to see what you’ve already sewn over when making a buttonhole.  I ended up getting blue painters tape and taping down the front so I could draw the buttonhole lines.  This was a game changer until the tiny bits of tape got stuck in the thread.  I’m still pulling it out😳  Buttonholes were really the only issue I had with this whole jacket.  

I wore it  for a week without buttons because I didn’t have time to make the buttonholes.  It’s much better now that it can stay closed! 

This is probably the first time I’ve winged it with a pattern and really had a final result that I had pictured from the beginning.  And I’m really glad it was all mostly the one pattern so I wasn’t going too far to make this happen.

Sunday, August 28, 2022

Oh Cecilia

woman stands against a fence in the cecelia tank
If you're looking for a tank top/dress with skinny straps and the option of a built in bra or not- Cecilia from 5outof4patterns *affiliate link* is your girl.  As with so many of 5outof4patterns *affiliate link* , there are so many options, you could use this one pattern for a dozen makes and no one would know they are from the same source!  

Cecilia *affiliate link* comes in many lengths from just a bra, to a crop top and all the way to a maxi length dress with other lengths along the way.

I thought I had enough tank tops but looking through my closet, what I don't have are many tanks with built in bras that I might wear under something in the winter and on its own in the summer.  The few rtw that I do still have are close fitting and if I'm going to wear one as a stand alone tank, I like a little flow.  Close fitting is fine for yoga or to keep warm, but if it's hot enough for me to go sleeveless, I need flow.

The flow was easy to achieve with the tank.  Because I'm so short in my torso, I always shorten 5outof4patterns *affiliate link* 3 inches.  There isn't as much of a curve to this pattern as with some of the others so I didn't shorten it for the first one I made.  I didn't like how it looked right under my arms, so I went ahead and shortened the torso my usual 3 inches and I like this result a lot better.

The pattern has options for two widths for the binding and straps.  I made my first one with the wide bound straps, but I didn't feel like it had enough support.  I added elastic but overall, I didn't like the result. 

For my next one, I went with FOE- fold over elastic.  Until recently, fold over elastic was truly my foe.  I didn't like using it.  I had a hard time manipulating it and getting everything in the foldover.

With this top though, the fold over seemed to come together and was so much easier than the bound straps. Because it's already elastic, I didn't need to add any and I also didn't need to do any ironing- always a plus!  Word to the wise- you need 1 inch FOE elastic.  I bought 5/8 inch online and it was definitely not going to do the job.

I zigzagged the FOE with a similar color thread so it doesn't draw attention and I really like how stretch it is.  I cannot make my stretch stitch on my Bernina actually behave like a stretch stitch, so the zigzag is my go to in this case.

I used 2 layers of powermesh and a layer of the same fabric for the underlying bra.  I debated adding liner pads and in the end decided it was more work than I wanted and didn't seem to do much to improve the look.  This is NOT a top I would exercise in except maybe to do yoga but it's a little prettier than my usual yoga tops.  Even with the 2 layers of powermesh, I don't find it that supportive.

One of the things I struggled with when I was making the Virginia Tank was trying to decide if I am an A/B cup or C/D.  I had the same problem here where A/B was going to be too short but C/D did nothing.  I folded the link halfway between those 2 lines and I like the depth.  I would not make this as a stand alone bra for myself but I like it a lot under this tank and it's made me want to go back and do a shelf bra in the Virgina Tank now that I have found the right depth.

For the tank, the lines make it a little closer fitting than I'd like but the lines go out a lot as it becomes a dress.  I stayed with the close fit through the ribs but then pulled it out as I got to the bottom to mimic the longer lengths and for me, it's exactly what I like.  It's casual but put together, I don't have to suck anything in and it's breezy for the really hot days of August.  

From the center of the front to the bottom of my hem is 17 inches and hits where I want a tank to land.  Sometimes, when I take the 3 inches from the torso, I don't need to add those 3 inches back at the bottom, but this time, I did.  I'm not sure what the original measurement for the tank was meant to be but I always feel like that's a matter of preference, anyway.

The back dips lower than a lot of tanks, and I like it.  I do not like high backed tanks at all, especially in hot weather.  This is meant to fall just at the bottom of the shoulder blades, which, if you had any visibly toned muscles in your back, will feature them nicely :)

The fabric is a fairly thin knit that I got in a mystery box.  I am not a purple/lavender person at all but this is OK in a tank.  I couldn't do a whole sleeved shirt or dress out of this.  I also really like how the FOE in the purple from the little flowers really pulls this together.  I couldn't use my double needel for the hem because this is the exact fabric that my machine and the double needle don't get along with, so I used a zigzag here as well.

I have another in black in a little bit heavier fabric that a) was dirty when I went to write this post and b) has tighter elastic and there are more bulges in the armpit area than I'd like, but the support is a lot better.  Fabric really will make a difference in your support and also your flow.

When I was making these and modifying the pattern for myself, I kept thinking about a dress length.  I would never wear it to work, and in the summer if I'm at home, I don't really wear dresses, so I'm not sure it would really get any wear.  There's also a tunic length which I toyed with to wear with cropped leggings but that's on hold for now.

Like so many 5outof4patterns *affiliate link* this is just a great pattern to use as it's written or to play with on your own.  With all of the length options, you can use it as a base for so many things.  There's also a nursing option, like so many of their patterns!


Thursday, August 11, 2022

Chelsea Chinos

blue shorts from the front
I had the pleasure of testing the new Chelsea Chinos pattern by 5outof4 Patterns (affiliate link).  This pattern has shorts, capris and pants for woven, non stretch fabrics.  My intention was to make pants but the timing of the test was when I was living on the surface of the sun, so shorts was the best I could do.  

Cry me a river:  I live in an old house with no central air and the one air conditioner we have isn't near my sewing room.  The sun comes into the sewing room around 1pm and by 4pm in the summer it's an inferno.  It was especially hot during the testing weeks so it was tricky trying to get the fitting right while also dripping with sweat.  Have you had the joy of trying to put on pants or shorts that are slightly small while your body is extremely sweaty?  There were times I wasn't sure if they were too small or if I was just that damp!

Speaking of fitting, I guarantee that no matter your body type, you will have to make adjustments to get a woven pants pattern to fit.  This is to be expected with homesewn bottoms and I love that!  You should love the idea that the final result will look better than when you started.  Knits are very forgiving and will easily mold to your body even if the fit isn't quite right, but woven pants demand that you get the fit right.  It doesn't matter how well store bought pants may fit, when you're making them for yourself, you will notice creases here, pulling there, and you will want to fix these areas.  And you may become obsessed and rip out 50 times before coming to a fit you can live with.  

Make a muslin or toile and get ready to make several before you get the fit you want.  I usually use flat sheets for this because they don't stretch and they are usually easy to find at thrift stores.

And once you find that fit, you will never know how you lived in ready to wear pants and shorts for all this time.  I haven't found the perfect fit yet but I'm closer than I was and getting even closer with each new pair I make.

blue shorts seen from the back
In the tutorial for the Chelsea Chinos (affiliate link), there are some great suggestions for getting certain areas to fit.  You can also ask  for help in the 5outof4 PDF Patterns group on facebook (or any sewing group you belong to, I'm sure) and you'll get suggestions and usually people will share links that helped them.   

As with all 5outof4 patterns (affiliate link), the tutorial is fantastic.  There are drawings and pictures all along the way.  For kinesthetic learners like me, this is a dream come true.  I read it, see the drawing, then the photograph and then I can make it happen myself.  There is also a variety of options, like every 5outof4 pattern (affiliate link) has.  The lovely thing about the tutorial is the live links so if you want to make pockets, you click the link and it takes you right to that part of the tutorial so you don't have to scroll and scroll.  

blue shorts seen from back
You can make them with or without the front pockets and with or without the welt pockets on the back.  Some testers just did the one pocket on the back, like where you'd keep a wallet, maybe.  For me, I need both pockets on the back of chino style pants and shorts
because I feel like I need that visual distraction on my butt.  I also learned a long time ago that because I stand and watch people so much in my line of work, I'm always looking for that back pocket to rest my hands in while I'm standing awkwardly behind you, helping you with your computer :0   

You have choices for shorts in several lengths, capris or full length pants.  For me, the 2inch was too short but the 5 inch was too long.  I like my shorts to hit in between and most of my shorts are 3.5 inches, so that's what I did here.

If you've never done welt pockets, they are well explained in the tutorial.  They are one of my favorite things to do because it's so hard to believe when you start that the finished product will look so fantastic!  

There is also a great tutorial for the zipper.  This is a very different zipper installation than I've seen in other pants/skirts/shorts patterns but I really like it.  It's very secure, it's not at all awkward as you're putting it together, and unlike one of my patterns that has a zipper, I'm not getting this one frayed area that I always get with that pattern!  I might use this method for all zippers going forward!

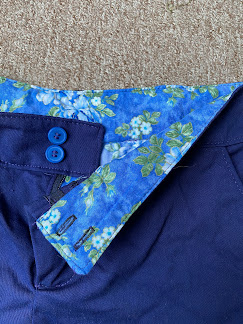
waistband of shorts
My very favorite part of this entire pattern is the waistband.  Not only is it hitting me exactly where I want a waistband to hit, but it's the right width and I finally managed to take in the back just enough to help with my dreaded swayback.  I will be casting these waistband pieces in gold and using nothing but this waistband for the rest of time.  I also LOVE the way it goes together.  Some waistbands have had me practially upside down trying to get them through the machine, or with so many pins I say every naughty word I know and more.  This one is very simple but so effective.  There's an option to have it be a tab waistband but I didn't do that one.  I have found that two smaller buttons work better than one large one because the waistband finishes at 2 inches.  That's a lot for one button to handle, I think, without it gapping. 

I also chose to do the inside of the waistband with the same fabric as the pockets.  I'm a big fan of "pretty guts", making pockets and waistbands inside pants look pretty.  Plus, I usually use a thinner cotton for these which makes the pockets not stand out stiffly and it cuts down on how much actual fabric you need for the outside.

One of the hardest things for me to find is the right fabric for actual chino pants.  For shorts, I find that anything with more heft than quilting cotton works well.  Some testers used linen but linen and I don't have the best relationship so I haven't used it for any bottoms, ever.  I've made shorts in other patterns with a printed denim, with home dec fabric, with twill, and I find they are all good.  For pants though, I want fabric like you'd get if you bought quality chinos from known stores.  I can't seem to find that in my local Joann fabrics.  The twill I've bought there has either been kind of lightweight, or, in the case of these shorts, has more strech than I want.  I did find what I think will be a fantastic weight twill with no stretch from Blackbird Fabrics and I bought it for these pants but I can't even think about pants in this heat so I haven't made them yet.  If you find a good twill for the pants, please let me know where you find it! 

I know real waistbands and non strech fabrics are not very popular in these times, but I am still fan of them both.  I also know a lot of schools are requiring uniforms and these would make great pants to meet the uniform requirements.  You could also make the longer shorts to go with those dress codes that allow shorts but have a length requirement. (my 3.5 inche length is probably not dress code appropriate :) ) With sizes ranging from 25 inch waist to 55 inch waist, you're sure to find the right size for your student to look put together this year! 

Monday, May 23, 2022

The Agility Bra, Tank and Dress

agility tank top

I've come full circle with 5outo4 patterns (affiliate link).  I started with the Agility Bra and Tank and here we are again!

The very first pattern I ever made from 5outof4 patters (affiliate link) was the Agility.  It was my first introduction to the patterns that have so many options, it's sometimes hard to narrow down what to start first!  It was also my first experience with a well thought out tutorial, full of amazing pictures, and very clear instructions.  

agility tank top
This first tank had a little mishap at the center front that made it slightly sketchy to wear in public, so I improvised and had to add a little fabric.  This had nothing to do with poorly written instructions.  It was all my poorly executed reading.

I love wearing these tanks because they are all in and I like the flow in the overlay.  I also used this overlay to hack another style bra from another company, but that's for a different post.

agility tank top
As with most patterns I like, once I start, I can't stop, so this was the next one.  This is probably my most favorite of my Agility collection.  The overlay is this amazing knit that just flows and is soft and I have no memory of buying.  I used it for the grey and black one too.  It's something I would have bought yards of if I'd known how it would hold up.  I also absolutely love the fun colors of the bra.

The Agility as a tank has two underarm heights.  I chose the slightly higher one, but there's one that goes lower than the bra.  I see a lot of them as bathing suits.  


agility bra

I also have made the Agility as just a stand alone bra twice.  I made the straps a little too snug on the first one so I don't wear it much.  The straps on this are fantastic.  For this version,  because my torso is short and my ribs stick out at the top, I shortened it slightly and used 1 inch elastic.  I find that to be a little more supportive than the recommende 3/4 inch.

And speaking of support, this is more of a yoga, run and do errands bra.  I tried adding power mesh and bra cups.  The first bra cups I tried were too point, think 1950s cone shaped bras and I really didn't like them.  They looked fake and also, I'll wear this for yoga if I laid on muy stomach, those cones would crush!  I also tried using bra cups but with this fabric, it seemed to highlight the outline of the cups, no matter how I arranged them.  Shortening this one slightly makes is feel a tad more supportive but I've come to terms with this never being one I'd run or jump or ride in.  

agility bra back
It's really comfortable, nothing digs in, and even the straps are easy to wear.  Straps on sports bras tend to want to creep close to my neck and end up giving me a headache but not these.  I did a fun criss-cross with the straps but you could play with them more.  There's also a T back that I haven't tried, if straps make you crazy.

I've learned that the way to put on a bra with straps like these is to make sure you know where your head is going before you start.  Once it's on, at least one of the straps will be twisted, so you just have to wiggle it and maybe do a little shimmy to get it flipped the right way.  Most of my home made sports bras have straps like these and I've mastered getting them on without getting tangled and then wiggling just right to get everything laying flat.

agility sports bra
This fabric is some kind of athletic knit.   It was a remnant from Joann and when I bought it, I remember thinking it was compression fabric.  It's not.  It's got a nice recovery, but it's not a heavy compression fabric.  I used powermesh on the inside.  

The overlay can be extended all the way to a dress.  I considered that but I wouldn't be able to wear it to work and there aren't many occasions where I'd want to have a cute dress that looks like this.  I've seen pictures that I really like of the dress length, but it's not for me, right now.  

Oh and as with so many 5outof4 patterns (affiliate link), there's a nursing option as well.  

If you are looking for a new bathing suit top, easy wear summer top or something to work out in, be sure to click my affiliate link and get yours now!


Monday, April 4, 2022

Josephine and the Weekender

back of a pink sweatshirt

If you're new to sewing or if you sew but fear knits becuase of the need for stretchiness, 5outof4 patterns (affiliate link) are fantastic and will completely take away your hesitation to sew knits.  They were the first knit patterns I used to build my athletic wear wardrobe and I've never stopped!  The tutorials are extremely detailed and have a lot of pictures and there are usually videos available too.  They are also some of the most versatile patterns I've seen, with so many options for sleeve lengths, collars, pockets, etc. that you can make the same pattern several times and no one would know it was the same pattern.

Some of your toughest decisions might be choosing from their vast assortment  for men, women and kids and THEN trying to decide which version to make first!  And I swear something about their options get the brain going and suddenly you'll find yourself saying "hey, maybe I can add those pockets to these pants and then I'll add that sleeve length to that top" and you'll be hooked.

I’m not a big sweatshirt or hoodie person.  I have a few and I wear them but not often.  I’ve made the Weekender pattern by 5outof4 patterns (affiliate link) twice  and like it but one is a Christmas one and the other pilled so I tossed it.  


Recently I bought some hemp and bamboo remnants that were in a natural color.  I got a wild idea to
dye some of it and make a hoodie.  The Weekender was pretty much what I was looking for and I needed to make something for my ambassador make for April.  AND I was itching to dye this fabric.
So this all came together in my head. 
pink sweatshirt

If you follow me on Instagram, you might have taken part in my poll asking if I should dye it pink, red or a blend of the two.  The response was use the pink with a splash of red.  I was looking for that faded “Nantucket red” or soft pink of a well worn sweatshirt.

After reading the instructions and suggestions for quantities of dye and how to dye in the washing machine for even application, I decided to give it a whirl.  The fabric weighed enough that it said 2-3 bottles should be good.  I had two bottles, one pink and one red.  So guess what I did.

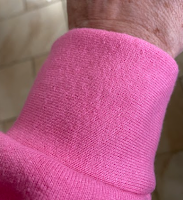
pink cuff of a sweatshirt
Yeah, not exactly a soft pink or well worn red 😂  I  was sure it would wash out and fade right away but after two washes, this bubble gum pink is ruling the day.  It's fine and I hope that it will eventually fade to a lighter pink but I don't think it will ever get to what I was picturing in my head.  And I'm not going to go through the dying process again.

I originally planned to have a hood on this top and I've made them before, so it should have been a breeze.  This fabric is much thicker than I realized, so as I started to topstitching the hood edge, I realized everything was too thick and short and things were not lining up.  The other fabrics I've used have had more stretch and were thinner.  This fabric is a sturdy sweatshirt fabric that has a little bit of give but is no way forgiving or flexible enough to fudge anything.  I quickly realized a hood would not work in this fabric unless I cut one much larger and things were feeling like that would quickly get out of hand.

pink crossed neck of a sweatshirt
I knew I had seen a collar somewhere that wasn't a cowl but also wasn't a crew neck.  A crew neck on
this and in this color would not work for me, I don't think.   A cowl in this fabric would sit on me like a cone on your dog after a visit to the vet so I knew that wouldn't work.   After asking around in my ambassador group, I was led to the Josephine and high crossover neckline is exaclty what I wanted.  I cut it out but it was still too high in the back, at first.  I trimmed it by about an inch from the back toward the front but I didn't cut into the original curve that allows for the crossover because I didn't want to that too be too short.

front view pink sweatshirt
The nice thing about 5outof4 patterns (affiliate link) is that a lot of the knit patterns will work nicely with each other.  Take a little of this from here, a little of that from there, and without a lot of calcultions, things will line up.  For me, this collar from the Josephine fit exactly around the neckline of the Weekender.  This could be because I had stretched out the neckline a little while trying to work out the hood, so I'm not certain, but you could manipulate it to make it work.

I'm not the biggest fan of cuffs and these are a lot deeper than I usually like.  The cuffs are actually not from a 5outof4 pattern.  I took the cuff from something else.  And because this fabric is sturdy, they scream CUFFS every time I look down.  I also trimmed the length of the sleeve a little more than I should have so the edge of the cuff is exactly at my wrist.  I like a little length in my sleeves, especially when I reach my hands forward.  I wore this for a day and everything settled nicely, so it's fine, but I definitely would not have cut off this much of the sleeve and would have made the cuff a little less.

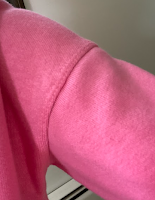
dropped shoulder of a sweatshirt, topstitched
Because of the dropped shoulder, I topstitched around the shoulders.  I'm a fan of topstitching on sweatshirts- I've had some nice sweatshirts that had a lot of topstitching details and I feel like they were better quality.  When I have a dropped shoulder, it doesn't feel as constricting, so I feel like I can topstitch and not pop stiches when I get it on and off.  

This top is meant to be casual and it's a sweatshirt, so I didn't do much for alterations.  I did take it up a little at the waist, because 5outof4  patterns (affiliate link) are always very long in the waist for me, but I'm not worried that it might bag at my swayback or be kind of boxy in the bodice.  Because, it's a sweatshirt.

I put a waistband at the bottom and found the calculations in the Weekender chart to be a little loose, so I went a little bit shorter.  There's no recovery from this stretch in this, but it works fine to get it off and on.  And because I'm a topstitching fool, I also topstitched along the band.  I used a double needle for all of the topstitching so there is some nice give.

I have not sewn anything else from the Josephine so I can't attest to much about that pattern, but I can say that the Weekender is very easy to put together.  It's a really quick sew unless you get fancy and do a lace up placket and even that isn't hard because there are amazing instructions, as you can always expect with 5outof4 patterns!  (affiliate link)


Wednesday, February 23, 2022

Piper Peplum And A Hack

Blue and white knit dress
For this month’s 5outof4patterns (affiliate link) ambassador make, I chose the Piper Peplum (affiliate link).  The very thought of a peplum gives me agita (fancy word for heartburn) because it’s not a look I find flattering on many people, myself included.  I like to draw attention away from the middle of my body and peplums, with their twirly fabric at the waist scream LOOK RIGHT HERE!  IT'S LIKE I'M TRYING TO HIDE SOMETHING BUT WE AREN'T FOOLING ANYONE.

Thankfully, there are lots of pictures of the Piper Peplum (affiliate link) out there and I discovered there’s a dress length, which takes that fabric at the waist and brings it down as a dress.  This is a style I like and the very first knit dress I ever made was something similar to this, so I was excited to try this version.


I’m at a point in my fabric stash that I have a lot of pieces that I’ve bought as remnants or clearance boxes from various sites and I never label them, so it’s always a gamble when I hunt for fabric.  I thought I had a cute blue and white polka dot fabric that would work but I didn’t have anywhere near enough.  This dress is a fabric hog because of the circle skrit.  Then I stumbled upon exactly the right amount of this, which is a DBP I remember buying at Joann. It must have been super cheap for me to have bought so much without a specific thing in mind.  I don't buy fabrics all that often without some idea of what I want to use them for.  I might not have a specific pattern in mind but I'll think "oh, this might be a good top, this would be nice for a dress,etc".  I don't have bins and bins of fabrics waiting to be used.

I’m also at a point where I’m kind of over the polyester in knits and I want to start finding good knits without polyester.  A needle in a haystack, I know.  It's hard when the only store locally is Joann fabrics and they don't have the widest variety.  Getting fabric online can be a huge task if you're picky like me and no matter what kind of info they give for dimensions, stretch, etc. I am someone who really needs to touch a fabric to know if it's going to work.

Mysteriously, this does not seem to stop me from buying a clearance box of mystery fabric online.  The thrifty girl in my sometimes takes over.

But let’s get back to the Piper Peplum dress(affiliate link).  This pattern is extremely easy and extremely quick to make.  This would be a great beginner pattern.  The hardest part is using the huge quantity of fabric in the skirt because it’s a circle skirt.  And it’s quite full!  I love a good twirly circle skirt and this fits the bill but I do look at all of the fabric and think "I could also made xyz out of all that..."

I had to shorten it a little because I didn’t have quite enough but that was fine because it was going to come below my knee anyway.  I’m 5’2”.

The bodice is short because for the peplum top, you’d be adding the flounce part around the waist.  The same bodice is used for the dress but keep in mind that the weight of the skirt will pull that bodice down.  If I had realize this, I might have shortened at the waist just a little, too.

This pattern has a sleeveless option, short sleeves, long sleeves and 3/4 sleeve.  It also has a crew neck or scoop neck.  I chose short sleeves and a scoop neck.

And just to keep it real, let me tell you how much swearing and frustration was caused by this fabric when I went to hem the skirt.  This is not at all a fault of the pattern, just my own issues.  DBP can be known for not gliding smoothly through machines, sometimes.  Other times, it will glide through like a greased pig. I have never been able to figure out how to know when it's going to glide or get stuck. 

All went well until I decided I didn't want to use a double needle for the hem because I knew I wouldn't need the stretch for such a full skirt.  This fabric and my machine were not having it.  I had to rip it out 3 times before I finally caved and used the double needle.   Full skirts can be a pill to hem anyway because of the curve and this knit was like let's up the game here .  I ironed and pinned (a rarity when it comes to my and knits) and nothing was working until I finally used the double needle.

And because I can’t help myself, I decided that since I liked the neckline and the sleeves, I wanted to make it into a top that didn’t have the flounce of the peplum.  I took another pattern that has the length and shape I wanted and just extended the Piper (affiliate link) bodice down and out to match that one.  This fabric is extremely unflattering in pictures but the purpose of this shirt is actually a yardwork shirt so I wasn’t going for high fashion.  I do a lot of getting dirty once spring comes, and my work shirts that were college t-shirts 25 years ago have all decided to turn in their resignations.  

This is one of those mystery knits that is clingier than I realized as I was making it and could have been made a little larger to accommodate the cling.  There must be a lot of polyester in there.  I don't dare show the back because with my swayback and short waist, the clingy fabric would make anyone who knows how to make alterations faint on the spot.  I didn't bother to do any kind of alteration because my intention was to make a work shirt but now I'm questioning that idea.

Now, who doesn’t love to see a twirly skirt twirl??


Be sure to click on my affiliate links (affiliate link) to get this pattern for yourself!


Wednesday, February 2, 2022

The Savannah Blouse and Dress

I enjoy making knits and wearing them, but there comes a time when I need to wear something woven and more structured or I start to feel like I'm losing touch with reality.   Because, somehow, woven clothing resembles reality to me.  I can't explain it.

I'm a 5outof4patterns (affiliate link)  ambassador because I love how they create their patterns and how very little tinkering is involved to get them to fit.  Most of their patterns are for knits (affiliate link)  , which are very forgiving to sew, especially for beginners, so when the call came to test a woven pattern, I couldn't contain my excitement!  

The Savannah Blouse and Dress is exactly the kind of top and dress style I love and I hoped, hoped, hoped, that the excellent sizing that I love about their knits would be found in this woven pattern too.  

Spoiler alert:  it is!

If you don't know about pattern testing, here's what happens with the indie pattern companies that I have been using for a while.  Someone creates a pattern and makes many versions in their own size to get a demo model.  Some kind of magic is done through a computer program that takes that sizing and then expands it up and down the size ranges with whatever tweaks need to happen for the various sizes, shapes and options that will be available in the pattern.   The designer says "I need people to commit to making this pattern in a couple of variations to make sure everything is sized correctly, prints correctly and that the directions make sense and don't leave anything out."  Ideally, every size offered would be tested by at least one person, and every option (sleeves, lengths, etc.) would also be tried out in many ways.  The more it's tested before releasing to the public, the greater the chance that all of the kinks will be worked out.  It's also important to have lots of people reading through the steps to make sure they get the right results.  I've been part of tests where a specific thing just doesn't work and a major change has to happen and then we all try again.

For me, there are two hard parts in testing a pattern.  One, I am someone who wants to just get it done, so making a muslin or two or three before using my "real" fabric is very difficult for me.  I like the process and I understand it but I always want to be like here, now let me get on with it :)  It has really made me slow down my sewing process and actually look at things and figure out stuff that I would never have noticed otherwise.  The designer wants to see the muslins and suggest changes if necessary and then we should make those changes and show how it looks and wait for the go ahead.  Sometimes, there's a lot of waiting.

The other hard part is the fast pace, slow pace.  Usually, the designer says during the call for testers that there is a short turn around, usually a week.  There's a specific facebook group made just for that test and everyone is supposed to post regular pictures, comments, questions, etc.  As an aside, I once tested a pants pattern and I was constantly shocked at how much talk about crotches and pictures of crotches and underwear came up on that facebook page.  People go all out to test a pattern and don't care who sees what while trying to figure out how to make something fit their bodies.  

Anyway, knowing that unless it's summer, I don't have a lot of sewing time, I work out when I will be able to get to work on it in the timeframe we are given.  And sometimes, the answers to questions can't come immediately because they want others to weigh in and see if it's a common issue, or life gets in the way and I can't check as quickly as I want to or the designer can't, etc.  So it's "OMG  I have to get on this NOW" and then it's "Oh shoot, I can't make another move until this crucial question is answered because it could change the entire thing!"   And then it’s “oh yeah, you missed the 3 crucial changes we did yesterday so print it out again and start over “.  

Don't get me wrong, it's fun!  I wouldn't volunteer to test a pattern if I didn't like it or if I knew I wouldn't have time.  And sometimes, I know I would never wear that pattern in a million years so I know testing it wouldn't be worth anyone's time because I wouldn't be invested.

But, seeing the demo of the Savannah (affiliate link)  , I knew I would move mountains to test this baby!  The neckline does just what my neckline wants and there are slight gathers in the front. Before she even announced that there would be a dress option, I was already extending the blouse into a dress in my head because that's what I've done with every blouse pattern.  It's like a compulsion.  How nice that someone who knows what they are doing would have already done it for me!

For the muslin of the top, I did a straight small.  The only alteration I made was to shorten through the bodice because my torso is so short.  I literally take up patterns 3-4 inches.  This was 3.5 inches and I added 1 inch back at the bottom.  I have zero space between my underarm and hip so I save a lot of fabric but I always have to shorten.

I was worrried that the hips might be a little more snug than I wanted after as I looked at the muslin, so I graded my final top out to a medium at the hips.  In revising the pattern to include the dress, she actually changed the width at the hips just enough that if I make the top again, I don't think I need to grade out to the medium at the hips.

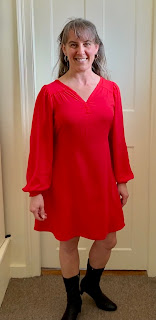
I chose the short puff sleeve for the top and the long puff sleeve for the dress.  I'm not sure what happened between the short and the long, but the width on these dress sleeves was so crazy to me, I had to bring them in 2 inches.  If I make long sleeves again, I would take out slightly more from the elbow to the wrist.   I feel like I could sail away!

The dress has ties and is very flowy.  At first, I wasn't going to use the ties, because I'm not much of a tied back dress person but I decided I should put them in.  When pattern testing, we really aren't supposed to go winging off and do our own thing and I figured if I hated them, I could remove them later.

There will be plenty of winging off in later iterations :)

The dress has an added pleat at the back.  When I made the top, I kept
thinking the back was slightly wider than I probably needed due to my swayback and I think I have a narrow back anyway.  When I made the dress, I felt like the back was WAY too wide.  The pleat is fantastic to make the whole thing flow, but for me, it makes too much fabric at the back.  When I tie the ties, there's more bulk than I'd like in the back.  For my taste.  If I made it again, I would try using the width of the back that is meant for the shirt.  I really think it would be enough.


For me, the hardest part of this entire process is the placket and binding. For the top, the fabric is a
stretch chiffon that was like trying to sew water.  It's slippery and refuses to hold a crease.  I love the look of it but sewing with it is not fun.  I figured my issue with the binding was due to it not holding a crease and just being so slippery.

However, with the dress, the fabric is a rayon challis.  It's very smooth and drapey but not as slippery as the
chiffon.  And it hold a crease like you read about.  But I still really struggled with the binding.  It's not the directions.  I get what to do.  Translating into how the fabric comes out when topstitched just didn't happen the way I wanted.  In the pictures, it looks pretty good and to the general eye, nothing looks amiss.  But I know how it could look.  I've been thinking a lot about another way I could do it that might make it lay better on my next one.  My next one will not be a solid, for sure.

Here are a few tips I suggest when you make yours (affiliate link)  : 

  • First, don't use a solid, especially in the bodice.  Several people did solid sleeves with a floral bodice.  Having some kind of print really helps mask any issues you might have with that binding.  
  • Second, if you like your sanity, choose a fabric that will hold a crease.  Hemming it and doing the binding will push you right over the edge if your fabric won't crease.  There was more silent swearing and screaming in my sewing room over that slippery chiffon than with any fabric I've sewn.
  • Third, choose a flowy, drapey fabric.  A heavy cotton or structured cotton (like for quilting) won't drape and would look stiff.  
  • Fourth, be ready to make many.  If the neckline looks good on you, you're going to want to make every sleeve length (and sleeveless) and both dresses and tops.  
Get ready for a slew of these tops and dresses in my feed. I think sleevless will be the name of the game as we head toward summer.

This pattern is on sale as it debuts this week.  Be sure to click my (affiliate link)  to get to the 5outof4patterns website and get this amazing pattern now!