Continuing in the 4x7 Sewing Challenge this month, I made a top for myself out of this knit fabric. There must be a rainbow theme perpetually in my head lately, because I see rainbow colors here too!
I bought this fabric originally to make the Sloan Leggings from Hey June, but decided it was too thick and probably didn't have enough 4-way stretch. It's 2 ply knit, I would call it. Two thin pieces of knit material put together to create a pattern on each side. On one side is the rainbow stripes you see here, and on the other, are tiny little heart, which I will show you at the bottom of this post. I am neither a heart not rainbow wearer, so this made choosing a side difficult!
You might wonder why I chose the fabric if I don't really love to wear rainbows or hearts. It was all the feel of the fabric. I liked the way it felt both weight-wise and texture-wise.
My first ridiculous error of the day happened when I printed the pattern. Hey June patterns are really neat because you can get just your size printed, if you choose in the layers in Adobe reader. That way you aren't cutting away all of the other sizes and wasting time and paper.
However, even when you've selected to view the layers for your size, you have to still put in the pages you want to print. Instead, I just hit print and got ALL 45 PAGES!! I couldn't believe I did that AND, it wasn't until after I printed that I decided I wanted to go up a size because I wanted this to be looser, like a sweatshirt.
You can be sure that I chose the size I wanted and then only typed in the specific page numbers to print the second time around!
This is the first top I've made that was actually meant to be a top with sleeves. The other tops I've made have been a hybrid of kitschycoo's Comino top and Lady Skater dress, or the Maria tank that didn't have sleeves.
I was thrilled to see that there were just a couple of pieces to cut out and I wasn't going to have to make adjustments.
It went together really easily, but I had a problem with the neckband and had to put it in twice. Not an easy feat thanks to my serger stitches, but it looks better the second time. I still had an issue and need to work on it. After I've worn the top a few times and washed it, I'll see what the neckband looks like.
It turns out, the fabric isn't really as heavy as I thought, so it's not really sweatshirt worthy. It's a good weight and I have already worn it. I think if I made the short sleeve version, I'd go down a size, but for a long sleeve, I think I'll keep the medium.
This is the first top I've made in a long time that I didn't shorten at all in the middle. I like the 2 inch hem on this one. If I made it as a t-shirt, I might cut it slightly to keep the hem at less than an inch, but for this top, I think the 2 inches works.
I also like that it doesn't have bands for the arms. I hemmed mine a little shorter than I like, so I will be taking them down about a half inch more. I used a zigzag stitch for those hems but it was tighter than I like, so it's all the more reason to undo them.
The zigzag on the hem of the whole top is my most favorite stitch in a long time. I finally got the stitch width and length just right so it's stretchy! Usually, one is too tight and the hem always feels like it will pop.
I've just about given up on the twin needle for hems. The zigzag is great for this and I think I'll just play it by ear with future hems.
Here's the print from the other side. While the rainbow stripes are a little strange, so are these little hearts, for me. I used the hearts side for the neckband, but the rest is all rainbow stripes.
I'm not sure if this is a top I will wear to school because I'm not in love with the stripes. Finding a good knit in a color or pattern I like is really difficult for me. We have one local fabric shop, just Joann fabrics, and I find their knits to be all over the place. Several have pilled almost immediately, which is a big no no for me. A few have held up beautifully. And a few have just been strange prints. I don't know exactly what I am looking for, which might be part of my problem. I like solid colors but the solids there are the least desirable texture. And I'm not a fan of mixing two colors or patterns together in a knit top the way everyone is doing around the internet.
I'm afraid to order knits online because I have no idea what they feel like or how heavy they really are.
I like sewing with knits and I've liked most of the finished products I've made, but I'm not sure it's been a very thrifty way to supplement my wardrobe. For me, sewing is usually about making something for less than I'd pay in a store and in a color or texture that I want that wasn't available in the store.
I grow things, I ride things, I bake things, I can things, I sew things and I make things. Sit with me on Aunt Mildred's Porch to witness this crazy journey I call my life and share the fun, laughter and utter foolishness that I come across from day to day.
Tuesday, February 16, 2016
Monday, February 15, 2016
Putting On My Big Girl Panties
And that's the only time you'll see that word on my blog! It makes me feel ill every time I hear or say that word! It's underwear only around here!
I mean, we only say that word. I don't mean we only wear underwear.
That would be ridiculous in the below zero weather we've had this week.
Anypanties, did I get your attention?
A while back, I hopped on the knit fabric wagon and got hooked, thanks to the amazing patterns by Amanda at kitschycoo. Her step by step directions with pictures are fantastic, but she's also some kind of wizard when it comes to sizing. Everything I've made of hers has fit me exactly as I want it to, even the Barrie Briefs. Underwear can be such a tricky thing with me.
The first pair of Barrie Briefs that I made were kind of a thick knit that made them feel more like bloomers for under a cheerleading or field hockey skirt. I like them but I never wear them under anything I'd actually wear in public because they are too bulky.
I kept thinking about trying to make them with other knits, but I hadn't gotten around to it until this week, during the 4x7 Sewing Challenge from berrybarndesigns. Give me a challenge and suddenly projects are flying out of my sewing machine.
I had these two shirts ready for the trash because both had met their demise. The blue one, which was one of my favorite colors ever, was weird from the beginning. It had an elastic at the bottom because that trend was popular for about a minute, and the whole surt was pretty stretchy. I liked the way it hung but I was never crazy about the elasticized bottom.
It didn't occur to me until this very second that I could have just pulled out that elastic and made a hem, but I bet it would have been too short.
I wore it for a family picture we took a couple of summers ago and a I wore it a few other times. I looking at the color but then forgot to wear it often. And then there were a couple of weird holes in it that I attributed to a) getting it from Old Navy and thus knowing it's poor quality and b) my other washing machine that loved to eat clothes. I finally gave up and decided it couldn't be worn anymore with one of those holes being near the shoulder.
Sad because I liked it so much.
This shirt was also one of my favorites because the color is a pink I really love. I got it at Ann Taylor Loft on a whim and liked it so much I got another one in a darker pink.
The top of it was kind of shirred with a thin elastic and one day, I noticed the elastic had given out so the shirring was loosening. The whole top was starting to look askew and though I know my sister would probably have just fixed it, I decided I didn't love this shirt enough to take the time to figure out how to gather it and make it look like the rest of the neckline. Plus, I didn't have any elastic cording to make it happen even if I did take the time to figure out how to do it.
Before I threw them out, I felt the textures and wondered if I could use them for something else. They are both smalls, so I knew I couldn't get much out of them, but maybe they would be right for the Barrie Briefs.
I thought I could get a pair out of each.
I started to take out the stitching on the blue shirt and once I got the elastics out, I gave up and just cut them apart. They didn't have big hems, so all that pulling out wasn't going to gain me much fabric.
I was thrilled to see some nice elastic in the bottom and cuffs of the blue shirt, so I pulled them out and will definitely reuse them. I want to make a cover for the stool in my sewing room, so my brain is already trying to use that thicker elastic for that.
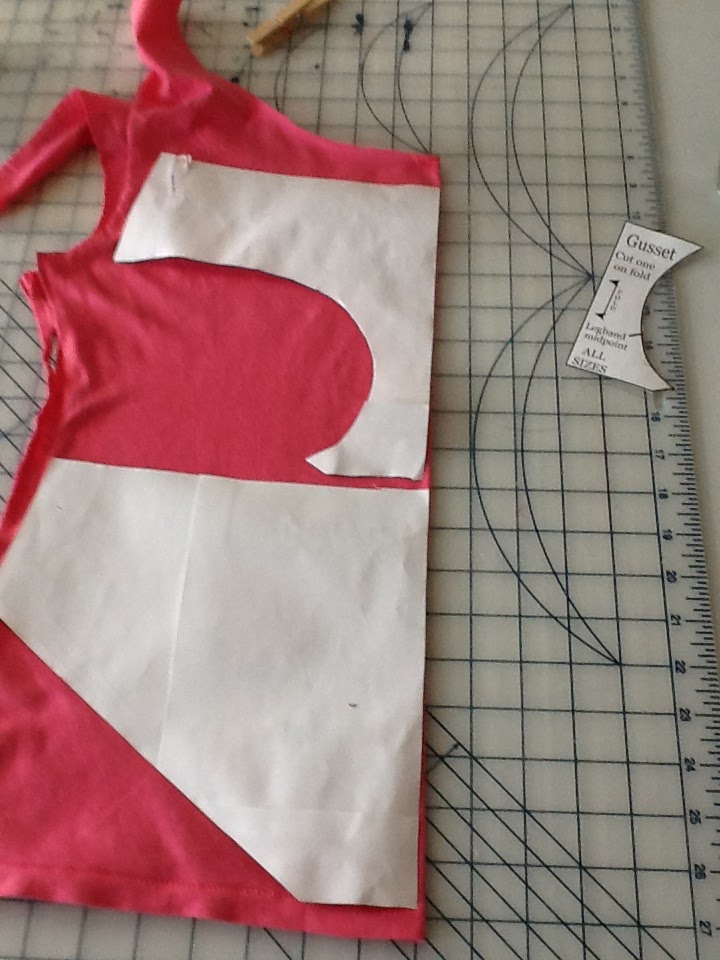
After some serious ironing, I laid out my pieces to see what I could get. From one side of the pink
shirt, I could get one whole pair of underwear, but not the bands. Since they were experimental anyway, and I don't really run around showing people my underwear (at least, not on purpose), I thought it would be fine and kind of fun to use the blue for the bands. The blue shirt wasn't going to give me enough material to make even one pair, so I decided to use it for the bands. Plus, it had more stretch to it, which I wanted in the bands.
The white for the gusset was some leftover white that I had completely forgotten about. I think I bought it for the bands for my first tank, when I took things much more seriously in the knits world. I no longer buy separate material for the bands, which I know is not the right way to do things, but I can live with the necklines stretching out a little as they are worn.
Putting these Barrie Briefs together is a mind boggler for me, kind of like making sure when I make pajama pants, I get the U going the right way. Luckily, there was no difference between the right and wrong side of this fabric, so it didn't matter if I had it flipped wrong.
Except for this. If you look veeeeerrrrry closely, you can see the remaining size on the pink shirt, a size small. This was meant to be on the inside, but clearly, I flipped it the wrong way.
Story of my life.
If I didn't have a serger, I wouldn't bother with knits, I don't think. I know they say you can use a zigzag stitch, but I just don't think I could get the same stretch that the serger gives me.
I've made quite a few tops and dresses with knits, so I pretty much understand how the bands go in. Still, I usually pre stretch and pin them because I don't want to put them in wrong and have to pick out serger stitching.
If you've never had the joy of having to tear out all of the stitches you made with a serger, you have no idea what seam ripping is truly about. It's enough to make me think if I cut very closely to the edge, I could just start again.
With these, I tried putting in the bands without much except for the crucial anchor pins and it worked really well. I wasn't too worried because they were just recycled fabric underwear, not meant for the light of day. But, it gave me enough confidence that I might try it with a top in the future.
I ended up with 2 pair. These are boy cut briefs, meant to sit more on the hip bones than up at the natural waist. The legs are also different from a typical brief. It surprised me to see how much fabric they actually need. When I first cut out the pink, I was sure they were going to be way too big, but they fit like they were made for me.
These are much thinner fabric than my first pair, but I haven't tried them under actual clothes yet. I think the serger seams are thick enough that you will see the lines and I won't like that. But I'll be happy to wear them to bed or when I know I'm not going anywhere.
I can't show a picture of them on me because, well, you just don't need to see that. But, if I make them into a pair of bathing suit bottoms like my sister plans to do, then you will see them whether you want to or not!
Linking here:
http://www.sewcando.com
http://www.flamingotoes.com/2016/02/show-and-tell-link-party-48/
I mean, we only say that word. I don't mean we only wear underwear.
That would be ridiculous in the below zero weather we've had this week.
Anypanties, did I get your attention?
A while back, I hopped on the knit fabric wagon and got hooked, thanks to the amazing patterns by Amanda at kitschycoo. Her step by step directions with pictures are fantastic, but she's also some kind of wizard when it comes to sizing. Everything I've made of hers has fit me exactly as I want it to, even the Barrie Briefs. Underwear can be such a tricky thing with me.
The first pair of Barrie Briefs that I made were kind of a thick knit that made them feel more like bloomers for under a cheerleading or field hockey skirt. I like them but I never wear them under anything I'd actually wear in public because they are too bulky.
I kept thinking about trying to make them with other knits, but I hadn't gotten around to it until this week, during the 4x7 Sewing Challenge from berrybarndesigns. Give me a challenge and suddenly projects are flying out of my sewing machine.
I had these two shirts ready for the trash because both had met their demise. The blue one, which was one of my favorite colors ever, was weird from the beginning. It had an elastic at the bottom because that trend was popular for about a minute, and the whole surt was pretty stretchy. I liked the way it hung but I was never crazy about the elasticized bottom.
It didn't occur to me until this very second that I could have just pulled out that elastic and made a hem, but I bet it would have been too short.
I wore it for a family picture we took a couple of summers ago and a I wore it a few other times. I looking at the color but then forgot to wear it often. And then there were a couple of weird holes in it that I attributed to a) getting it from Old Navy and thus knowing it's poor quality and b) my other washing machine that loved to eat clothes. I finally gave up and decided it couldn't be worn anymore with one of those holes being near the shoulder.
Sad because I liked it so much.
The top of it was kind of shirred with a thin elastic and one day, I noticed the elastic had given out so the shirring was loosening. The whole top was starting to look askew and though I know my sister would probably have just fixed it, I decided I didn't love this shirt enough to take the time to figure out how to gather it and make it look like the rest of the neckline. Plus, I didn't have any elastic cording to make it happen even if I did take the time to figure out how to do it.
Before I threw them out, I felt the textures and wondered if I could use them for something else. They are both smalls, so I knew I couldn't get much out of them, but maybe they would be right for the Barrie Briefs.
I thought I could get a pair out of each.
I started to take out the stitching on the blue shirt and once I got the elastics out, I gave up and just cut them apart. They didn't have big hems, so all that pulling out wasn't going to gain me much fabric.
I was thrilled to see some nice elastic in the bottom and cuffs of the blue shirt, so I pulled them out and will definitely reuse them. I want to make a cover for the stool in my sewing room, so my brain is already trying to use that thicker elastic for that.
After some serious ironing, I laid out my pieces to see what I could get. From one side of the pink
shirt, I could get one whole pair of underwear, but not the bands. Since they were experimental anyway, and I don't really run around showing people my underwear (at least, not on purpose), I thought it would be fine and kind of fun to use the blue for the bands. The blue shirt wasn't going to give me enough material to make even one pair, so I decided to use it for the bands. Plus, it had more stretch to it, which I wanted in the bands.
The white for the gusset was some leftover white that I had completely forgotten about. I think I bought it for the bands for my first tank, when I took things much more seriously in the knits world. I no longer buy separate material for the bands, which I know is not the right way to do things, but I can live with the necklines stretching out a little as they are worn.
Putting these Barrie Briefs together is a mind boggler for me, kind of like making sure when I make pajama pants, I get the U going the right way. Luckily, there was no difference between the right and wrong side of this fabric, so it didn't matter if I had it flipped wrong.
Except for this. If you look veeeeerrrrry closely, you can see the remaining size on the pink shirt, a size small. This was meant to be on the inside, but clearly, I flipped it the wrong way.
Story of my life.
If I didn't have a serger, I wouldn't bother with knits, I don't think. I know they say you can use a zigzag stitch, but I just don't think I could get the same stretch that the serger gives me.
I've made quite a few tops and dresses with knits, so I pretty much understand how the bands go in. Still, I usually pre stretch and pin them because I don't want to put them in wrong and have to pick out serger stitching.
If you've never had the joy of having to tear out all of the stitches you made with a serger, you have no idea what seam ripping is truly about. It's enough to make me think if I cut very closely to the edge, I could just start again.
With these, I tried putting in the bands without much except for the crucial anchor pins and it worked really well. I wasn't too worried because they were just recycled fabric underwear, not meant for the light of day. But, it gave me enough confidence that I might try it with a top in the future.
I ended up with 2 pair. These are boy cut briefs, meant to sit more on the hip bones than up at the natural waist. The legs are also different from a typical brief. It surprised me to see how much fabric they actually need. When I first cut out the pink, I was sure they were going to be way too big, but they fit like they were made for me.
These are much thinner fabric than my first pair, but I haven't tried them under actual clothes yet. I think the serger seams are thick enough that you will see the lines and I won't like that. But I'll be happy to wear them to bed or when I know I'm not going anywhere.
I can't show a picture of them on me because, well, you just don't need to see that. But, if I make them into a pair of bathing suit bottoms like my sister plans to do, then you will see them whether you want to or not!
Linking here:
http://www.sewcando.com
http://www.flamingotoes.com/2016/02/show-and-tell-link-party-48/
Sunday, February 14, 2016
Selfish Sewing Week #2
What a week it has been in the 4x7 Sewing Challenge!
I had a really productive weekend last weekend and then Monday was a snow day and Tuesday, we had a 2 hour delay. All very good for finding time to sew!
First and foremost, I found the most important scissors I've ever owned! These things are so sharp and amazing, when I thought they were gone, I lost my mind. I brought them with me when I trimmed threads on the rainbow quilt and then I thought the cats had played with them and stashed them somewhere. They are way too sharp for them to play with, but I couldn't find a better answer.
After a week of looking and feeling totally lost, they were in the arm of the chair!
I completed several projects this week, so I will show you each one, but then I will write separate posts about the highs and lows of each one. You'll have to check in and see throughout the week!
First, I finished quilting and binding on the rainbow quilt.
This was definitely one of my most favorite quilts to make and to look at.
I haven't given it to its intended recipient yet and each time I look at it, I like it even more.
But, with no place to put a rainbow quilt in my house, I'd rather give it to a baby now and make another one for myself later.
I used rainbow colored thread which is cool because when the color goes over the same color on the quilt, it blends perfectly, but then the colors also stand out on other parts.
I especially like how it looks on the white square in the middle.
The snow made for great picture taking!
I finished binding the quilt and folded it and left for the day. When I came back, Luke was completely out, curled up right in the middle. I know some people freak out over animals on new quilts that you're giving away, but the people I' m giving it to have an animal and I couldn't find much of his hair on it anyway.
Once I was able to stop admiring my rainbow, I repaired a strap on a canvas grocery bag. I had really filled the bag and had it on my shoulder when the strap broke and slapped me across the face. I thought someone had thrown something at me at first!
Then, I got to work on the Sloan Leggings from Hey June. I bought material that I thought would be fun and stretchy enough, but after talking to my sister about it, I decided it probably wasn't right for my first attempt at leggings.
I went through my stash and found a remnant of a black knit that I bought a while ago that magically was big enough. I think it's a little too thin, and perhaps a size smaller might fit better. There's definitely 4 way stretch, but probably too much.
Click here for more and an entertaining story about interfacing.
I've had some shirts laying around that I needed to stop wearing because they had little holes in them. When I realized they were a nice, thin knit that hadn't pilled when I wore them as shirts, I thought I'd keep them and try making the Barrie Briefs by kitschycoo again.
Lo and behold, two new pairs of underwear (never call them panties!) for me! More about them in this post, including how heartbreaking it was to give up the blue shirt I used for the bands. OK, it wasn't exactly heartbreaking but I had to give up a piece of clothing that I really like!
That knit that I mentioned a few paragraphs ago, the one I bought for leggings and decided not to use? I put it to use here in the Union St. tee from Hey June. I was thinking more along the line of sweatshirt than close fitting t-shirt and I like how it came out. Click here for a better close up of the colors and the nitty gritty.
So, this week seemed to be all about the knits, once I got the rainbow taken care of! And with 3 new wardrobe pieces for me, it was selfish sewing, indeed!
Linking here:
http://www.berrybarndesigns.com/blog/4x7-sewing-challenge-week-2-progress
http://www.skiptomylou.org/made-by-you-monday-276/
http://www.the-chicken-chick.com/2016/02/clever-chicks-blog-hop-178-featuring.html
http://olives-n-okra.com/merry-monday-91/
http://www.julieslifestyle.blogspot.com/2016/02/cooking-and-crafting-with-j-j-38-and.html
http://www.sewcando.com
I had a really productive weekend last weekend and then Monday was a snow day and Tuesday, we had a 2 hour delay. All very good for finding time to sew!
First and foremost, I found the most important scissors I've ever owned! These things are so sharp and amazing, when I thought they were gone, I lost my mind. I brought them with me when I trimmed threads on the rainbow quilt and then I thought the cats had played with them and stashed them somewhere. They are way too sharp for them to play with, but I couldn't find a better answer.
After a week of looking and feeling totally lost, they were in the arm of the chair!
I completed several projects this week, so I will show you each one, but then I will write separate posts about the highs and lows of each one. You'll have to check in and see throughout the week!
First, I finished quilting and binding on the rainbow quilt.
This was definitely one of my most favorite quilts to make and to look at.
I haven't given it to its intended recipient yet and each time I look at it, I like it even more.
But, with no place to put a rainbow quilt in my house, I'd rather give it to a baby now and make another one for myself later.
I used rainbow colored thread which is cool because when the color goes over the same color on the quilt, it blends perfectly, but then the colors also stand out on other parts.
I especially like how it looks on the white square in the middle.
The snow made for great picture taking!
I finished binding the quilt and folded it and left for the day. When I came back, Luke was completely out, curled up right in the middle. I know some people freak out over animals on new quilts that you're giving away, but the people I' m giving it to have an animal and I couldn't find much of his hair on it anyway.
Once I was able to stop admiring my rainbow, I repaired a strap on a canvas grocery bag. I had really filled the bag and had it on my shoulder when the strap broke and slapped me across the face. I thought someone had thrown something at me at first!
Then, I got to work on the Sloan Leggings from Hey June. I bought material that I thought would be fun and stretchy enough, but after talking to my sister about it, I decided it probably wasn't right for my first attempt at leggings.
I went through my stash and found a remnant of a black knit that I bought a while ago that magically was big enough. I think it's a little too thin, and perhaps a size smaller might fit better. There's definitely 4 way stretch, but probably too much.
Click here for more and an entertaining story about interfacing.
I've had some shirts laying around that I needed to stop wearing because they had little holes in them. When I realized they were a nice, thin knit that hadn't pilled when I wore them as shirts, I thought I'd keep them and try making the Barrie Briefs by kitschycoo again.
Lo and behold, two new pairs of underwear (never call them panties!) for me! More about them in this post, including how heartbreaking it was to give up the blue shirt I used for the bands. OK, it wasn't exactly heartbreaking but I had to give up a piece of clothing that I really like!
That knit that I mentioned a few paragraphs ago, the one I bought for leggings and decided not to use? I put it to use here in the Union St. tee from Hey June. I was thinking more along the line of sweatshirt than close fitting t-shirt and I like how it came out. Click here for a better close up of the colors and the nitty gritty.
So, this week seemed to be all about the knits, once I got the rainbow taken care of! And with 3 new wardrobe pieces for me, it was selfish sewing, indeed!
Linking here:
http://www.berrybarndesigns.com/blog/4x7-sewing-challenge-week-2-progress
http://www.skiptomylou.org/made-by-you-monday-276/
http://www.the-chicken-chick.com/2016/02/clever-chicks-blog-hop-178-featuring.html
http://olives-n-okra.com/merry-monday-91/
http://www.julieslifestyle.blogspot.com/2016/02/cooking-and-crafting-with-j-j-38-and.html
http://www.sewcando.com
Friday, February 12, 2016
A Whirling Dervish In my Sewing Room
I've heard that artists can get so lost in what they are doing, their studios become a disaster area and they lose entire days to their craft, not coming up for air until their pieces are done.
Lunatics, I've always called those people.
Until I look at what happens when I sew from an idea in my head. If I'm using a pattern, I usually am pretty good about having everything ready and ironed and while I make a mess and get caught up in what I'm doing, I can take a break and do things a normal person does.
But, when there's an idea in my head that I'm finally giving a try, all bets are off. I have no idea how my room ends up like this. In this picture, my sewing machine isn't even on the right table and I can't put it in its proper spot until I move everything, including that dustbuster... How did that get there? Clearly no cleaning was taking place in this room.
I see everyone "pull fabric" for a project and they have these lovely folded fabrics, looking like fat quarters with their neatness. They lay them out, line them up, check out how everything goes together and take pictures for the rest of us to see on pinterest.
When I "pull fabric" it's usually out of the bottom of some pile and it takes a lot of "pulling" to get it out from where I want it!
Let's take the rainbow quilt as an example. I've had this idea swirling about in my head for years, and finally decided to act on the idea. Many of the people I follow on instagram would have not only been able to pull all of their rainbow colors and arrange them in a neat pattern first, they would have actually had their rainbow colors arranged in such a way that they knew exactly where everything is.
I do have a great color organizing system for big pieces of fabric and that has been one of my best ideas. But, I knew the the rainbow quilt was going to be made from a lot of scraps, so there was no neat pile of colors.
No well ironed pieces ready to be cut and sewn.
Instead, there was a half hour of digging through my scraps drawer, deciding on the fly which widths I'd use, based on the most common widths of the scraps I had. The less cutting and measuring, the better. I did pull out pieces and arrange them in rainbow colored piles, but they were not ironed and in some cases, they were still attached to other pieces that I had to tear out and pull apart.
Definitely not pinterest worthy.
Next in the mayhem that is my sewing from my head, I had no real plans for how big this quilt would be. When I'm winging it, I have no preconceived measurements, no idea how much fabric I will need, no idea what I will do when I get 3/4 of the way through and don't have enough of some crucial fabric.
Because, when it comes to making something, I JUST WANT TO SEE THE FINISHED PRODUCT! I've usually been thinking about it for so long, I just can't wait to see if it will come out the way I want. I won't take the time to prethink all of the math. I let the fabric and ideas speak to each other and off I go.
It's like I'm sewing without protective gear.
Hours go by. I have to go to the bathroom, but I wait until the last possible minute. I set a timer, but then turn it off. I set limits, like after this CD is done, after this episode, etc., but I still I keep at it.
I would hardly call this the same sort of frenzy that artists like painters or potters get themselves into when they are one with their craft because I don't really think of quilting as that sort of art. But something definitely overtakes me when I'm trying to make something I've been dwelling on for a while and I lose all sense of everything: time, common sense, reasoning, speed.
It's like I'm a hippy, all free and going with the flow!
Once I finish my imagined item, I can come up for air and think about cleaning up my mess. Sometimes, I return my sewing room to its normal state. But sometimes, I don't have time and off I go, leaving my room looking like a bomb went off, and it might stay like that for months.
I fall over things, have to clear space to do the smallest task and get annoyed with it all and wonder how I can be such a mess.
And then the next idea strikes me and it all starts again!
Linking here:
http://olives-n-okra.com/funtastic-friday-61/
Lunatics, I've always called those people.
Until I look at what happens when I sew from an idea in my head. If I'm using a pattern, I usually am pretty good about having everything ready and ironed and while I make a mess and get caught up in what I'm doing, I can take a break and do things a normal person does.
But, when there's an idea in my head that I'm finally giving a try, all bets are off. I have no idea how my room ends up like this. In this picture, my sewing machine isn't even on the right table and I can't put it in its proper spot until I move everything, including that dustbuster... How did that get there? Clearly no cleaning was taking place in this room.
I see everyone "pull fabric" for a project and they have these lovely folded fabrics, looking like fat quarters with their neatness. They lay them out, line them up, check out how everything goes together and take pictures for the rest of us to see on pinterest.
When I "pull fabric" it's usually out of the bottom of some pile and it takes a lot of "pulling" to get it out from where I want it!
Let's take the rainbow quilt as an example. I've had this idea swirling about in my head for years, and finally decided to act on the idea. Many of the people I follow on instagram would have not only been able to pull all of their rainbow colors and arrange them in a neat pattern first, they would have actually had their rainbow colors arranged in such a way that they knew exactly where everything is.
I do have a great color organizing system for big pieces of fabric and that has been one of my best ideas. But, I knew the the rainbow quilt was going to be made from a lot of scraps, so there was no neat pile of colors.
Instead, there was a half hour of digging through my scraps drawer, deciding on the fly which widths I'd use, based on the most common widths of the scraps I had. The less cutting and measuring, the better. I did pull out pieces and arrange them in rainbow colored piles, but they were not ironed and in some cases, they were still attached to other pieces that I had to tear out and pull apart.
Definitely not pinterest worthy.
Next in the mayhem that is my sewing from my head, I had no real plans for how big this quilt would be. When I'm winging it, I have no preconceived measurements, no idea how much fabric I will need, no idea what I will do when I get 3/4 of the way through and don't have enough of some crucial fabric.
Because, when it comes to making something, I JUST WANT TO SEE THE FINISHED PRODUCT! I've usually been thinking about it for so long, I just can't wait to see if it will come out the way I want. I won't take the time to prethink all of the math. I let the fabric and ideas speak to each other and off I go.
It's like I'm sewing without protective gear.
Hours go by. I have to go to the bathroom, but I wait until the last possible minute. I set a timer, but then turn it off. I set limits, like after this CD is done, after this episode, etc., but I still I keep at it.
I would hardly call this the same sort of frenzy that artists like painters or potters get themselves into when they are one with their craft because I don't really think of quilting as that sort of art. But something definitely overtakes me when I'm trying to make something I've been dwelling on for a while and I lose all sense of everything: time, common sense, reasoning, speed.
It's like I'm a hippy, all free and going with the flow!
Once I finish my imagined item, I can come up for air and think about cleaning up my mess. Sometimes, I return my sewing room to its normal state. But sometimes, I don't have time and off I go, leaving my room looking like a bomb went off, and it might stay like that for months.
I fall over things, have to clear space to do the smallest task and get annoyed with it all and wonder how I can be such a mess.
And then the next idea strikes me and it all starts again!
Linking here:
http://olives-n-okra.com/funtastic-friday-61/
Sunday, February 7, 2016
Selfish Sewing Week 1
Last week, I made the scary commitment of actually writing down goals for the 4x7 Sewing Challenge, hosted by berrybarndesigns. Once it's written down, it has to happen!
I more than got my 7 hours of sewing in this week and most of it was selfish.
I started the week with this gem. It's not my horse blanket, but it is my trainer's horse's blanket and since I've always thought it was so dumb to throw away torn blankets when they can be repaired, I was thrilled to finally be able to give in to my curiosity and fix one.
Plus, I'm sure the people over at Pessoa are ready to croak over seeing their name so ridiculously tacked onto another brand of blanket that doesn't even match.
Selfish sewing indeed :)
Then I had two quick hand sewing repairs: an old fleece vest that I wear for riding which was like a $10 buy at a discount store about a decade ago and has lasted me all this time, and k-ster's snow pants. They are fairly old and look great, but one of the threads appears to have rotted and came undone.
Easy peasy, and no need for pictures.
K-ster's friend had some curtains for his bathroom that were too big and he wanted me to cut them down. I am sad to say that I didn't do anywhere near my best work, so I didn't take a picture. He's tickled, the windows are covered, and they are out of my hands.
Selfish because I wanted them done so I could get to the next thing. Case closed.
I also finally got around to cutting out the paper pattern for Sloan leggings from Hey June. I'm really skeptical that they will work without a fancy coverstitch machine, but I cut them out and thought about fabric. I took a trip to Joann to see what knits they had and bought the most ridiculously expensive knit in the place, completely by accident. By the time I got to the register and realized, I decided it was fine since it was slightly on sale and I usually get great bargains, so I was due to pay the price.
By then my sister suggested that it wasn't the best knit for leggings because it probably wouldn't have enough stretch all the way around, and stretch is my biggest worry for self made leggings. I agree and now I have to restrategize that one.
And figure out what I'm going to do with that fabric now....
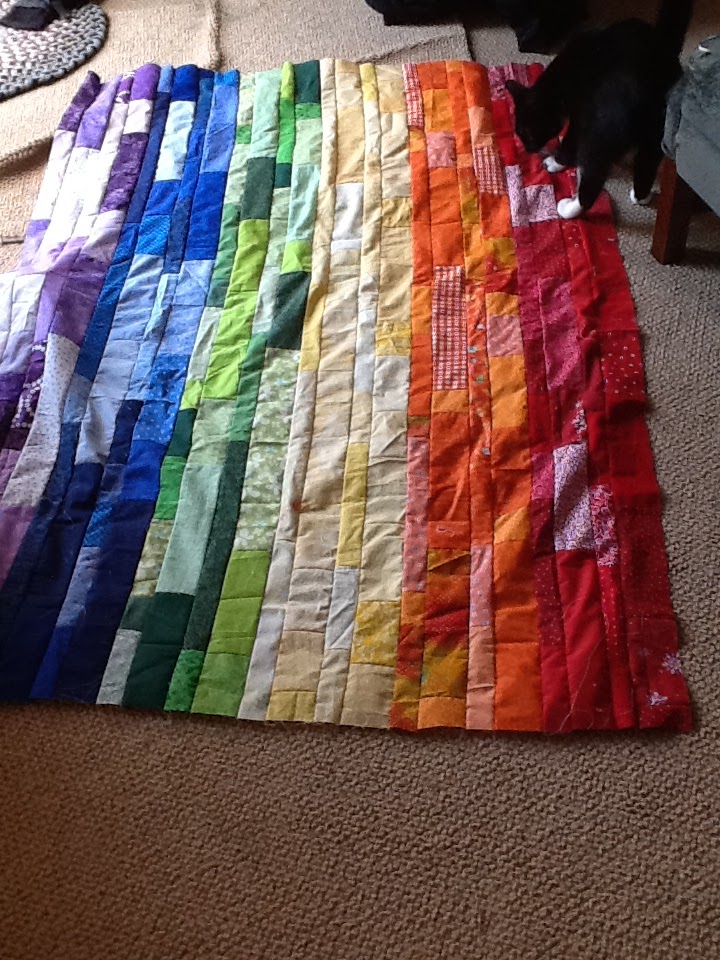
But, all the while in the background, the rainbow quilt was coming to life!
I've had this rainbow idea floating around in my head for a long time. I thought if I sewed a bunch of strips together in a rainbow and then cut them up and arranged them, I'd have quite a quilt.
Construction, deconstruction, reconstruction. NO idea what got into me.
So, I got out all kinds of strips that I have in my stash, as well as my stash itself, and got to work making 2 inch and 3 inch strips. I decided to do a 3 inch, then 2 inch, then 3 then 2 of each color.
When I was done, I had about 48 inches by 60+ inches. While Bo gave his kitty approval, I wasn't so thrilled. I knew I wanted it to be wider than 48 inches, but I didn't know what to do.
So, I decided to take each color away from the others, so I had just a fat strip of red, orange, etc. All that sewing only to under the rainbow. My plan was to cut a bunch of 8 inch squares of each color because that's how wide each color was.
Just as I was about to cut, I had a brainstorm that I should make a log cabin out of the rainbow, with a white square in the center.
Because most of what I do when I'm not following a pattern (and sometimes even when I am) has very little forethought and never any measuring, all went really well until the second orange strip. I ran out of strip, so I had to make more and then I had to make more red, all of which took a while because I had already used most of the red and orange strips in my stash. Lots of repeats there.
All together, I liked the look.
I thought a white edge would really pull it together.
So far, the entire top was nothing but my stash and scraps and I was really pleased with that. I debated what to do about the back when I found this piece folded away.
I'm not really sure why I had yards and yards of this stashed away but I think it might have had to do with a fish applique quilt that made a few times. I was on a roll and thought this looked like bubbles so I bought a bunch. It might even have been a remnant at the time so I snatched the whole thing.
I don't do much applique these days, so the fish quilt hasn't resurfaced in a while.
I don't worry too much about backs matching fronts or making sense with fronts because in my mind, they are two completely separate things. But, with the blue in the rainbow, this would be fine.
I was on such a roll with using just what I had in my sewing room, I thought maybe I could finagle a batting. Whenever I make a quilt, I always have left over batting but never enough to do much with. It's usually long strips that are less than 12 inches wide. Or nice wide pieces but not too long.
I fantasize that I will make bags and potholders, but who really does that?
I've heard about whipstitching or zigzagging batting pieces together to make "frankenbatting" but I remember someone tell me they thought it would fall apart inside the quilt, so I've only added a small strip here or there as needed. I knew I'd quilt it pretty close, so I thought I'd give it a whirl with this.
I should call this challenge the "Give it a Whirl Challenge" because I think I've said it out loud and in print about a dozen times this week.
I was fairly pleased with the batting although there was a little curved issue that I didn't realize I'd done but no one will know except for me.
I needed to get some white thread, which was what I planned to quilt with, but while I was at Joann, it hit me that maybe rainbow thread would be fun. I bought two of the smaller spools and actually ran completely out of both. This about 60 x 60 so I was shocked to run out of one spool, let alone two. I almost bought one bigger one, but figured I'd be stuck with rainbow forever.
I thought the rainbow would be neat on the white spaces and I think it is, but it's better in real life. Or at least, in real light.
The only successful quilting I can do on anything over about 24 inches is my wavy quilt stitch. My machine has this stitch as one of its few decorative stitches and I feel like it gives me a lot of leeway. I am all about precision but when it comes to manhandling a quilt through my regular sewing machine (that means not a longarm!) precision goes out the window and I'm happy if I can make it through a row without breaking anything, including a body part.
A woman at school who knows I sew walked into my room the other day with some things she didn't want anymore and in the bag were these! I don't know what you'd call them, but they go around the rolled part of the quilt to keep it rolled. I have been looking for these forever because I was sure I had seen them once, but didn't know what they were called.
At one point, I even asked k-ster if there was a tool that went around pipes like this because I thought maybe I could get them at the hardware store. But, without a picture, the best he could come up with was something that wasn't open like this and the openness is what makes it work.
They aren't completely fool proof. As you unwind one side, they start to get too loose and then the other side isn't quite ready for them. So, there is still a period where I'm holding, squeezing and praying that it won't all come undone.
But overall, they are a Godsend.
I finished the quilting but didn't take a pictures because it was too dark to do them justice. Plus, now I can put the binding on and completely finish it for next week's reveal.
I had one of the most productive sewing weeks I've had in a while. Probably since last year's 4x7 Sewing Challenge!
Can't wait to see what's up this week, and with a snowday already declared, I'll be Giving it a Whirl all week long!
Linking here:
http://www.berrybarndesigns.com/blog/4x7-sewing-challenge-week-1-progress
http://www.myturnforus.com/2016/02/freedom-fridays-with-all-my-bloggy_11.html
http://www.flamingotoes.com/2016/02/show-tell-link-party-4/
http://www.thesitsgirls.com
http://www.sewcando.com/2016/02/craftastic-monday-link-party.html
http://www.skiptomylou.org/made-by-you-monday-275/
http://www.julieslifestyle.blogspot.com/
http://olives-n-okra.com/merry-monday-90/
http://www.the-chicken-chick.com/2016/02/clever-chicks-blog-hop-177-featuring.html
I more than got my 7 hours of sewing in this week and most of it was selfish.
I started the week with this gem. It's not my horse blanket, but it is my trainer's horse's blanket and since I've always thought it was so dumb to throw away torn blankets when they can be repaired, I was thrilled to finally be able to give in to my curiosity and fix one.
Plus, I'm sure the people over at Pessoa are ready to croak over seeing their name so ridiculously tacked onto another brand of blanket that doesn't even match.
Selfish sewing indeed :)
Then I had two quick hand sewing repairs: an old fleece vest that I wear for riding which was like a $10 buy at a discount store about a decade ago and has lasted me all this time, and k-ster's snow pants. They are fairly old and look great, but one of the threads appears to have rotted and came undone.
Easy peasy, and no need for pictures.
K-ster's friend had some curtains for his bathroom that were too big and he wanted me to cut them down. I am sad to say that I didn't do anywhere near my best work, so I didn't take a picture. He's tickled, the windows are covered, and they are out of my hands.
Selfish because I wanted them done so I could get to the next thing. Case closed.
I also finally got around to cutting out the paper pattern for Sloan leggings from Hey June. I'm really skeptical that they will work without a fancy coverstitch machine, but I cut them out and thought about fabric. I took a trip to Joann to see what knits they had and bought the most ridiculously expensive knit in the place, completely by accident. By the time I got to the register and realized, I decided it was fine since it was slightly on sale and I usually get great bargains, so I was due to pay the price.
By then my sister suggested that it wasn't the best knit for leggings because it probably wouldn't have enough stretch all the way around, and stretch is my biggest worry for self made leggings. I agree and now I have to restrategize that one.
And figure out what I'm going to do with that fabric now....
But, all the while in the background, the rainbow quilt was coming to life!
I've had this rainbow idea floating around in my head for a long time. I thought if I sewed a bunch of strips together in a rainbow and then cut them up and arranged them, I'd have quite a quilt.
Construction, deconstruction, reconstruction. NO idea what got into me.
So, I got out all kinds of strips that I have in my stash, as well as my stash itself, and got to work making 2 inch and 3 inch strips. I decided to do a 3 inch, then 2 inch, then 3 then 2 of each color.
When I was done, I had about 48 inches by 60+ inches. While Bo gave his kitty approval, I wasn't so thrilled. I knew I wanted it to be wider than 48 inches, but I didn't know what to do.
So, I decided to take each color away from the others, so I had just a fat strip of red, orange, etc. All that sewing only to under the rainbow. My plan was to cut a bunch of 8 inch squares of each color because that's how wide each color was.
Just as I was about to cut, I had a brainstorm that I should make a log cabin out of the rainbow, with a white square in the center.
Because most of what I do when I'm not following a pattern (and sometimes even when I am) has very little forethought and never any measuring, all went really well until the second orange strip. I ran out of strip, so I had to make more and then I had to make more red, all of which took a while because I had already used most of the red and orange strips in my stash. Lots of repeats there.
All together, I liked the look.
I thought a white edge would really pull it together.
So far, the entire top was nothing but my stash and scraps and I was really pleased with that. I debated what to do about the back when I found this piece folded away.
I'm not really sure why I had yards and yards of this stashed away but I think it might have had to do with a fish applique quilt that made a few times. I was on a roll and thought this looked like bubbles so I bought a bunch. It might even have been a remnant at the time so I snatched the whole thing.
I don't do much applique these days, so the fish quilt hasn't resurfaced in a while.
I don't worry too much about backs matching fronts or making sense with fronts because in my mind, they are two completely separate things. But, with the blue in the rainbow, this would be fine.
I was on such a roll with using just what I had in my sewing room, I thought maybe I could finagle a batting. Whenever I make a quilt, I always have left over batting but never enough to do much with. It's usually long strips that are less than 12 inches wide. Or nice wide pieces but not too long.
I fantasize that I will make bags and potholders, but who really does that?
I've heard about whipstitching or zigzagging batting pieces together to make "frankenbatting" but I remember someone tell me they thought it would fall apart inside the quilt, so I've only added a small strip here or there as needed. I knew I'd quilt it pretty close, so I thought I'd give it a whirl with this.
I should call this challenge the "Give it a Whirl Challenge" because I think I've said it out loud and in print about a dozen times this week.
I was fairly pleased with the batting although there was a little curved issue that I didn't realize I'd done but no one will know except for me.
I needed to get some white thread, which was what I planned to quilt with, but while I was at Joann, it hit me that maybe rainbow thread would be fun. I bought two of the smaller spools and actually ran completely out of both. This about 60 x 60 so I was shocked to run out of one spool, let alone two. I almost bought one bigger one, but figured I'd be stuck with rainbow forever.
I thought the rainbow would be neat on the white spaces and I think it is, but it's better in real life. Or at least, in real light.
The only successful quilting I can do on anything over about 24 inches is my wavy quilt stitch. My machine has this stitch as one of its few decorative stitches and I feel like it gives me a lot of leeway. I am all about precision but when it comes to manhandling a quilt through my regular sewing machine (that means not a longarm!) precision goes out the window and I'm happy if I can make it through a row without breaking anything, including a body part.
This is how I roll, literally. I don't pin baste. I did that once and was furious at the mess I made. It bunched and was just awful. I lay it all out, smooth and smooth and smooth, hold my breath and roll it up from one direction on the diagonal, smoothing as I go.
A woman at school who knows I sew walked into my room the other day with some things she didn't want anymore and in the bag were these! I don't know what you'd call them, but they go around the rolled part of the quilt to keep it rolled. I have been looking for these forever because I was sure I had seen them once, but didn't know what they were called.
At one point, I even asked k-ster if there was a tool that went around pipes like this because I thought maybe I could get them at the hardware store. But, without a picture, the best he could come up with was something that wasn't open like this and the openness is what makes it work.
They aren't completely fool proof. As you unwind one side, they start to get too loose and then the other side isn't quite ready for them. So, there is still a period where I'm holding, squeezing and praying that it won't all come undone.
But overall, they are a Godsend.
I finished the quilting but didn't take a pictures because it was too dark to do them justice. Plus, now I can put the binding on and completely finish it for next week's reveal.
I had one of the most productive sewing weeks I've had in a while. Probably since last year's 4x7 Sewing Challenge!
Can't wait to see what's up this week, and with a snowday already declared, I'll be Giving it a Whirl all week long!
Linking here:
http://www.berrybarndesigns.com/blog/4x7-sewing-challenge-week-1-progress
http://www.myturnforus.com/2016/02/freedom-fridays-with-all-my-bloggy_11.html
http://www.flamingotoes.com/2016/02/show-tell-link-party-4/
http://www.thesitsgirls.com
http://www.sewcando.com/2016/02/craftastic-monday-link-party.html
http://www.skiptomylou.org/made-by-you-monday-275/
http://www.julieslifestyle.blogspot.com/
http://olives-n-okra.com/merry-monday-90/
http://www.the-chicken-chick.com/2016/02/clever-chicks-blog-hop-177-featuring.html
Monday, February 1, 2016
A Trusty, Dusty Machine
Horse blankets cost anywhere from $100 to crazy amounts I can't even type, so if a blanket rips, you really don't want to run out and buy a new one.
For someone who sews, the idea of throwing away a blanket because of a tear is heart breaking, but the idea of bringing a very dirty horse blanket near my sewing room and Lady Bernina was impossible to process. I'm still twitching at the idea of horse sweat gliding through her Lady parts! The only way I'd consider it would be if the blanket was washed first, but washing it might make things worse because the batting might fall out and really make a mess.
Back when I first discovered freecycle.com, I ended up with this very old Kenmore. I got it for a
friend who decided she wanted to sew and since it was free, I figured it was worth cleaning up and testing out. And it worked just fine. Straight stitches, no nonsense. Can you imagine stitching on a machine that can only do a straight stitch???
My friend was highly unimpressed with this behemoth and quickly found a more modern machine that weighed about half of this one and looked a lot more modern and pretty. I don't blame her. It's like driving your great grandfather's jalopy. It's big, it's noisy, it feels ancient and it has some rust and dirty spots. It does not inspire sewing things like lace or baby blankets.
It makes you feel like you need to be sewing seat covers and industrial strength straps on things.
For years, maybe close to a decade, it has sat in her garage, never touched again. I figured this might be a good machine to use to do some barn tack repairs because : it's already given a lifetime of use so if it dies, it's no big deal. It's pretty heavy duty and seemed like it could power through thicker materials. I wouldn't mind if it got dirty.
Where to set it up became the next question. It's winter and cold outside, and at the barn, the only place with heat is the bathroom. I didn't really want to haul it in to the barn but I also didn't want to set it up in my kitchen, though that seemed like the best idea because I could clean that room best if I got dirt and horse grime all over the place.
It turned out to be a very mild weather, so I set it up out in the unheated garage and got to work. What should have been a very simple set up quickly became a big fight with the thread and just as I was about to give up on the whole idea, I changed threads and it was like a whole new day.
I needed a lot of space to spread out both the ripped blanket and the blanket that I was going to use to get the new leg strap. There's something wrong with the plaid one, aside from no horse wanting to be caught dead in plaid, so she told me to go ahead and cut whatever I needed off of it.
In my experience, all of the blankets I've used have the same leg strap and buckling system. Not only would this work because the buckle was the same, but the angle it was sewn on the plaid blanket was the same as the navy one, so everything was set to come together like it's supposed to.
I did some math and actually got a tape measure to make sure I was placing the strap at the same place as it was on the old blanket. Good thing I did because on the plaid blanket, there was more space between the strap and the back of the blanket binding, so I had to make some on the spot decisions. One of those decisions was how to attach the binding. Since the binding of the navy blanket was still in one piece (how this all was torn is kind of unfathomable because the material is completely gone but the binding is still intact... what horses can accomplish in the ways of destruction is really mind boggling), I didn't want to cut it and create a bulky join.
I decided to rip out the top stitching on the binding so I could open it and slide the new piece in and restitch. Two rows of stitching and a very old seam ripper and a lazy seamstress who didn't want to go in her house to get her better seam ripper made for a lengthy process but it was eventually all ripped out and ready to sew.
I sewed the binding on first because I was most concerned about that. I figured I could fudge the attachment of the rest of the new piece as long as the binding properly encased the new piece.
Once I figured out my thread issue, that machine sailed right through!
The plaid had some nice lines that I actually followed for folding and sewing but I needed to pin it all in place. This material is thick ripstop nylon and there is a nylon lining inside. Most of what I needed to sew didn't involved batting but there was one area that was slightly thicker with some batting in it. It's all pretty slippery and I thought maybe some spray on glue would be good next time to help hold it in place.
Getting pins through the waterproof layers was tricky and my fingers are pretty sore.
If the old blanket had been navy this would have been even better but it's totally functional and saved a ton of money! Plus, when someone isn't familiar with every horse in the field, she can say "the one with the little piece of plaid on the blanket" and everyone will know who she means!
I'd like to offer to do this more often for people, but set up is a pain. I have nowhere to leave this old machine set up and it's so heavy I'm not sure where I even want to store it. At the moment, it's riding around in my car but that has to stop. There's a problem with the presser foot, so if I were to do more repairs, I'd need to find a replacement. I think it's bent and the needle kept hitting it, so I ended up using the only other foot I could find which was a rolled hem foot. It did the job but wasn't ideal.
I'm pretty sure this machine is from the 1950s, so to use it in 2016 is a pretty impressive feat!
Linking here:
http://www.flamingotoes.com/2016/02/show-and-tell-link-party-47/
http://www.myturnforus.com/2016/02/freedom-fridays-with-all-my-bloggy.html
http://www.thesitsgirls.com
http://olives-n-okra.com/funtastic-friday-60/
Subscribe to:
Posts (Atom)