Thursday, July 13, 2023

Sunshirts: So You Can Sweat In Style and Pretend You Feel the Cooling

As a fair skinned person who spends innumerable hours outside, I’m always worried about sun protection.  Living as I do on the coast, you’d think I spent all of my childhood summers baking at the beach but that couldn’t be further from the truth.  I did go to the beach, but not all day, every day, and I did often wear long sleeved shirts or sunscreen to try to keep the sun off. I never wanted to be super tan because it seemed like a burn was always my skin’s first choice.  I got my share of sunburns though never so bad they blistered or needed the ER.  

Fast forward to my adult years and ta da, I had a basal cell carcinoma which isn’t as scary as many kinds of skin cancer but is still something to have removed and scare the crap out of me in the meantime.  The one I had removed was on top of my head, which is interesting because I do wear hats a lot outside, and a helmet always when I ride, but there were many, many years of outdoor running with a visor instead of an actual hat.  Lesson learned.

No doubt, I’ll get more of these lovelies and possibly other things in my lifetime, so now I’m extra nuts about keeping out of the sun.  Impossible when I garden, ride horses, live my entire life to be outside in the summer, etc.  I’m really slick about knowing where the sun is in relation to my yard at various times of the day so I know I can’t weed on that side of the house until after 2, etc., but for the rest of the time that I can’t really hide, I wear sunshirts.  

I got my first sunshirt for free with purchase of something for riding and I was impressed that it was lightweight, had “vents” for cooling under the arms, didn’t stick to me when wet and kept me from getting burned.  I tried a variety of them, found one I loved and, you guessed it, they stopped making that style.

Fast forward to 2019 when I started making my own.  I started with the Greenstyle Pacific Pullover and tried a lot of adjusting to try to get the underarm cooling vents in just the right spot.  I made a bunch in the next couple of years, with varying placements of the mesh for cooling but the sleeve was always a little strange.  

Then I made the Ascent from 5outof4 patterns (affiliate linkand figured out that the underarm inserts were more suited to the mesh inserts for cooling.  This pattern is meant for fleece, so I find it bigger overall than most of their patterns.  When I made it in fleece, it was pretty big but fine as a sweatshirt.

I wanted to bring it down to a thin fabric for sunshirts, so I ended up going down several sizes and for the sleeves, I went down one size lower than for the front and back bodice.  These sleeves are pretty loose and I do like that, but I didn’t want them quite as floppy as some of my initial versions.

I struggle a lot with the zipper and collar instructions in the Ascent pattern (affiliate link), so I got back to the Pacific Pullover instructions because they are so good and work perfectly.  I also use Leah Winkleman’s trick for covering the zipper tape and getting a pretty inside edge on the collar, which I show in the last picture, at the bottom of the page. 

Word to the wise:  you can use twill tape or ribbon to do the prettiness here, but I’ve done it twice and finally realized that with a stretchy knit, you really should use a knit fabric to do this or it leaves the neckline a little stiff.  It’s fine and totally wear able, but you see that the collar kinds of stands out and that’s because the ribbon doesn’t stretch.  

Also note that the neckline of the Ascent pattern (affiliate link) is higher than the Pacific so you should use a longer zipper.  I used 7.5 which is what I’ve used in many of my Pacifics, but in the Ascent pattern (affiliate link), it’s a little close to my collar bones even at it’s fully open place.

The fabric is Chitosante Interlock from Discovery Fabrics.  I’ve used 5 of these colors and for reference, the heathered versions seem to have a little less bulk to them. They are all listed as lightweight but this fuschia one doesn’t feel as thin as some others I have.

The mesh is a power mesh from my sister and is the most durable of all of the mesh I’ve used.  I have to confess that some mesh in my previous shirts has been from the bridal section of the fabric store and probably has no business being worn often, with friction u deer the arm!

Overall, while these sunshirts and their fabrics claim to be cooling and sweat wicking, the reality is that if it’s summer, you will feel like you’re creating your own swamp no matter what fabric you use.  It is very nice when the wind blows and you feel it through the soaking wetness you’ve created.  And the vents give a great illusion of heat release, but I’d have to walk around with my arms fully outstretched 100% of the time to really get any cooling.  

Yes, they are cooler than a cotton or poly t shirt. 

Yes, they dry faster.

Yes, they are much lighter weight than a t shirt.

But you’re still going to roast.


Tuesday, May 23, 2023

The Ashley Skort

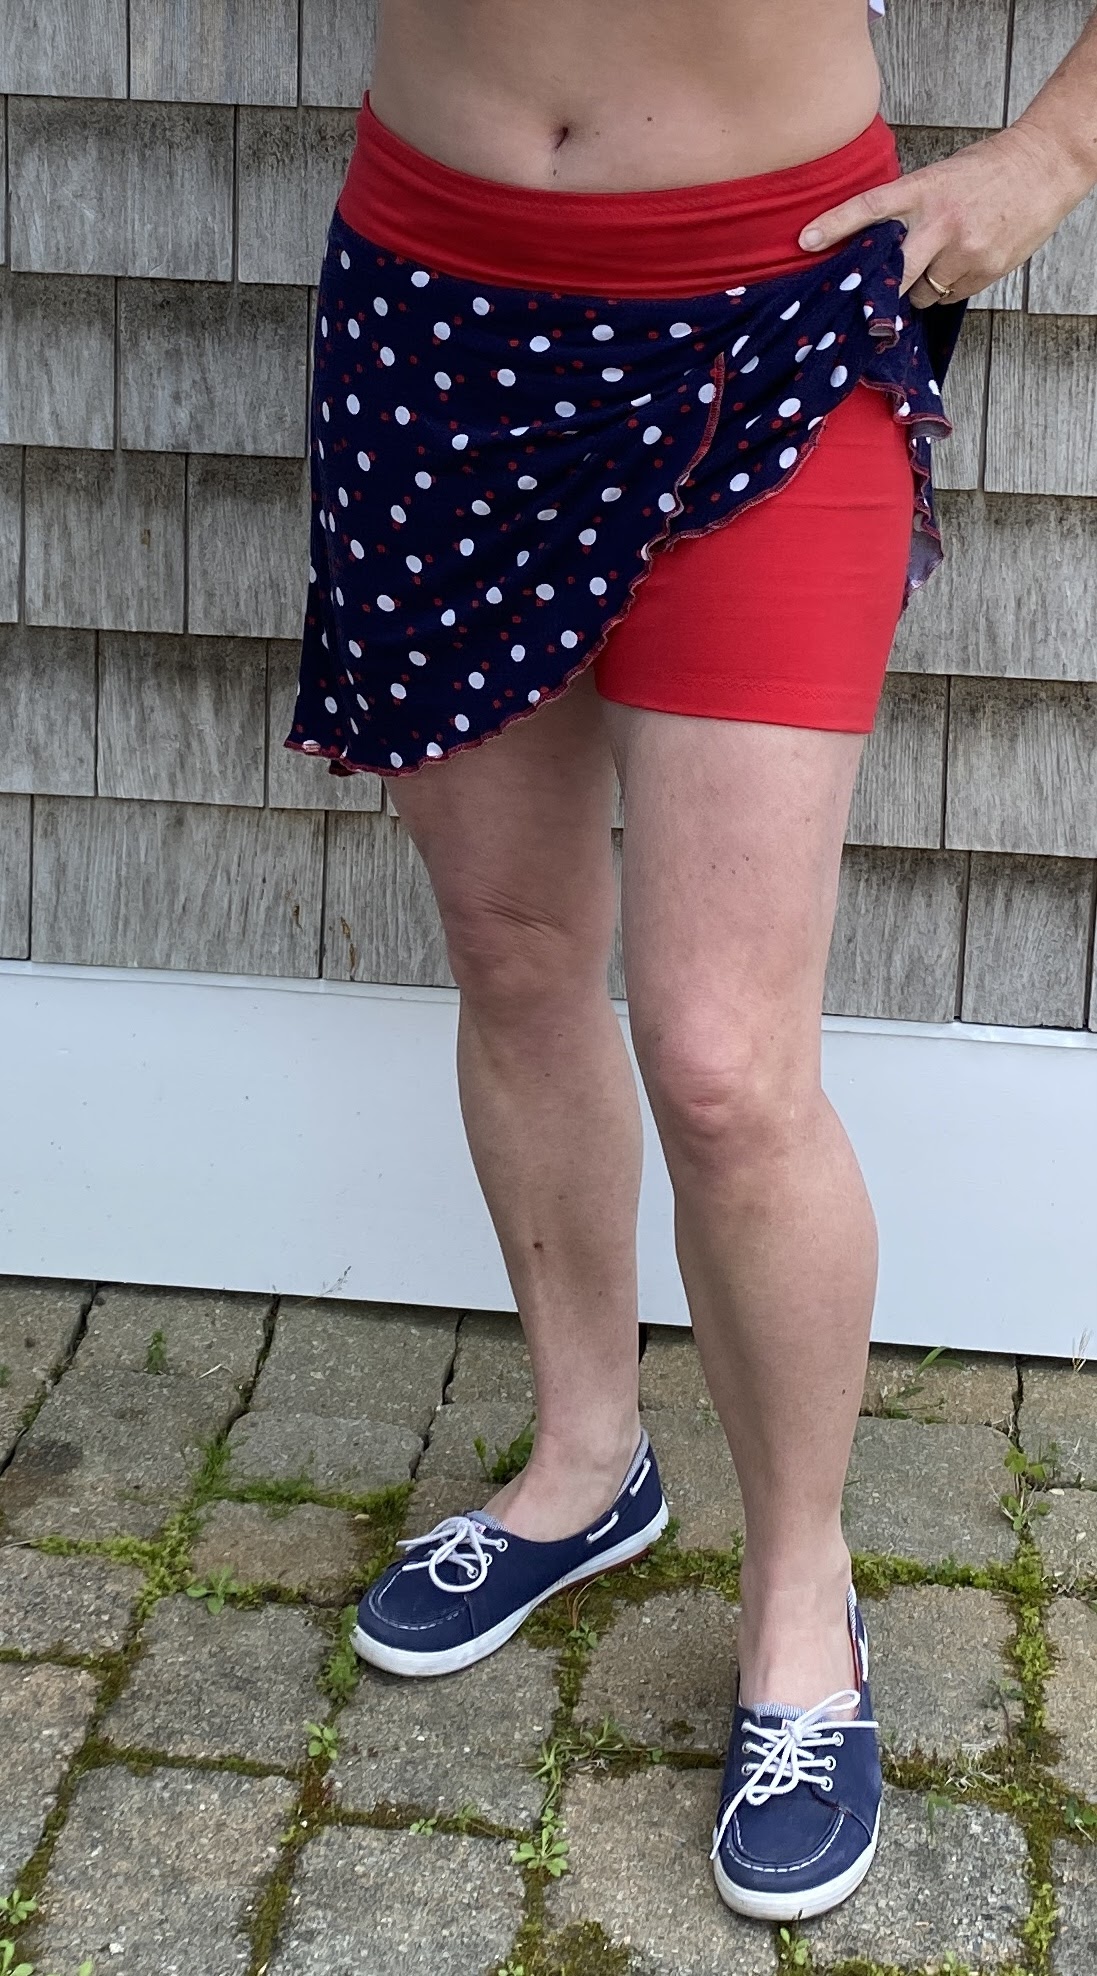
Three pictures of mini length skorts

Are you looking for a summer staple?  Look no further than Ashley Skort by 5outof4patterns (affiliate link).  So many choices: mini, knee, tea, maxi lengths, contour, fold over, elastic waistband, maternity, low, mid, or high rise and the shorts can have pockets, or not. The shorts can have no gusset, half a gusset or a full gusset. Oh and the skirt can be woven or knit.

Any idea which one you’ll choose yet?  (affiliate link)

For me, a skort is about a functional skirt that can be worn to do lots of active things: sports, chasing toddlers around the park- that sounds creepy-  I mean chasing your own toddlers or those within your care- gardening, activities with lots of bend or getting up and down.  All things that having shorts underneath would make much easier.

I once had a love affair with running skirts which always had shorts but the affair ended because the shorts never fit right.  They usually would slide up my athletic thighs and make me crazy and ruin the joy of looking cute.  For me, a skort should be short.  The shorts are there in the event I accidentally flash someone because my hemline is questionable but the shorts also have to stay in place and serve a purpose.  Ashley skort from 5outof4patterns (affiliate link) does just that,

For this pattern, the front hem is higher than the back, especially at the maxi length.  One person said she loved the idea of a cape flying behind her as she ran after her kids, with the freedom to move her legs because of the shorter front 😂. For me, maxi length is not an option.  I feel like I’m wrapping myself in fabric all day once it goes below my knees.  

I chose the mini length for all of mine.  Given my 5’2” frame, it doesn’t look too mini.  It’s almost knee length in the back.  

As with all 5outof4patterns (affiliate link) , this one comes with “shorten/lengthen here” lines so for this one, I shortened it 2 inches and also just did a lettuce hem.  It’s still longer than I’d expect for mini but it’s a very thin knit that grows as the day wears on😂. You know those knits?  They feel so nice because they are soft and flowy but have you ever tried to sew them?  I equate it to trying to sew water.  I used thin fabrics for the shorts, the skirt and the waistband on two of mine and almost lost my mind trying to sewing all and make sure nothing slipped out.

For all of mine, I chose to make shorts.  This skirt could be made as just a skirt but check the cross in the front if you’re worried about modesty.  Two of my shorts don’t have pockets but these do.  Excuse the ridiculous shorts fabric given the fabric for the skirt.  In my head, no one will ever see the shorts so who cares if they match?  Well, if you’re going to show them in the initial release for the pattern, then really, they should match.  Lesson learned.  

The shorts have lines for 2, 5 and 7 inch inseams.  I chose 5 inch for two of them and  did a one inch hem.  For the red pair, I went for a 4 inch inseam and one inch hem because they are for the shortened mini.  

Let’s talk about the waistband.  I did the contour for all of them.  There’s the suggestion to use elastic around the top and I highly suggest it.  This particular one is a cotton Lycra that grew all day and I chased that waistband everywhere around my abdomen. Even with the elastic, it rode up and down as moved,   The other two didn’t do that at all, so I’m blaming the fabric, for sure.  

Here’s why I ended up with the cotton Lycra.  This skirt is a woven and I’m not a fan of the waistband on a woven being a knit.  I can’t explain myself, but it’s a look I really don’t like, for myself.   I got this wild idea that somehow, I was going to make a woven waistband work.  I even went so far as to cut the woven waistband to fit my hips and then I expected the elastic to pull it all in at my waist.

It fanstasticly did not work.  Even though I tried it two different ways and had to remove the waistband both times.   At that point, I needed a black knit to be the least conspicuous- white would have really made me upset because it’s a different color AND a different fabric from the skirt- and I grabbed the first thing I found.  Not a fan of the waistband on this one so something will have to be done.

For this one, the waistband is the same as the skirt and that’s my favorite option.  The shorts on this one are  see through purple and therefore not for pictures, but I can tell you I didn’t pay attention to what I was doing and made a gusset out of the red and white polka dots.  Right in the crotch of my pale purple shorts.  This is one of those things that make me think if I’m in any kind of accident while wearing these, they’re going to be so confused if they have to cut my clothes off in the ER😂

Don’t tell me you’ve never had this thought when you’re wearing something you made that has something that the public would never normally see.  There’s always something, isn’t there?

This one ties as my favorite with the one above.  Look at that different waistband from the skirt!  Again, I can’t explain my rationale but this is fine with me.  Something about the red shorts and the red waistband and the red polka dots on the skirt just go together.   This red fabric is a French terry that I loved but when I first washed it, the whole piece was ruined because something else in the load ran all over it.  I didn’t throw it away and I’ve been slowly using pieces of it that aren’t tainted.  This was perfect for the shorts since no one really looks and there is some dark color on the waistband but most likely, no one will see it.  

Contrary to most of my pictures here, I will not be wearing any of these with a bare midriff😂.   I’m so short in the torso that nothing I own for a top works well to show off the waistband of this skort .  If you happened to drive by last week around lunch time 3 days in a row while I was standing in my yard, my shirt tucked up into my bra and smiling, now you know why.   I wasn’t just flashing the neighbors, the flora and the fauna- I was completing a pattern test for 5outof4patterns (affiliate link) 

Friday, April 28, 2023

The New Hannah Pattern


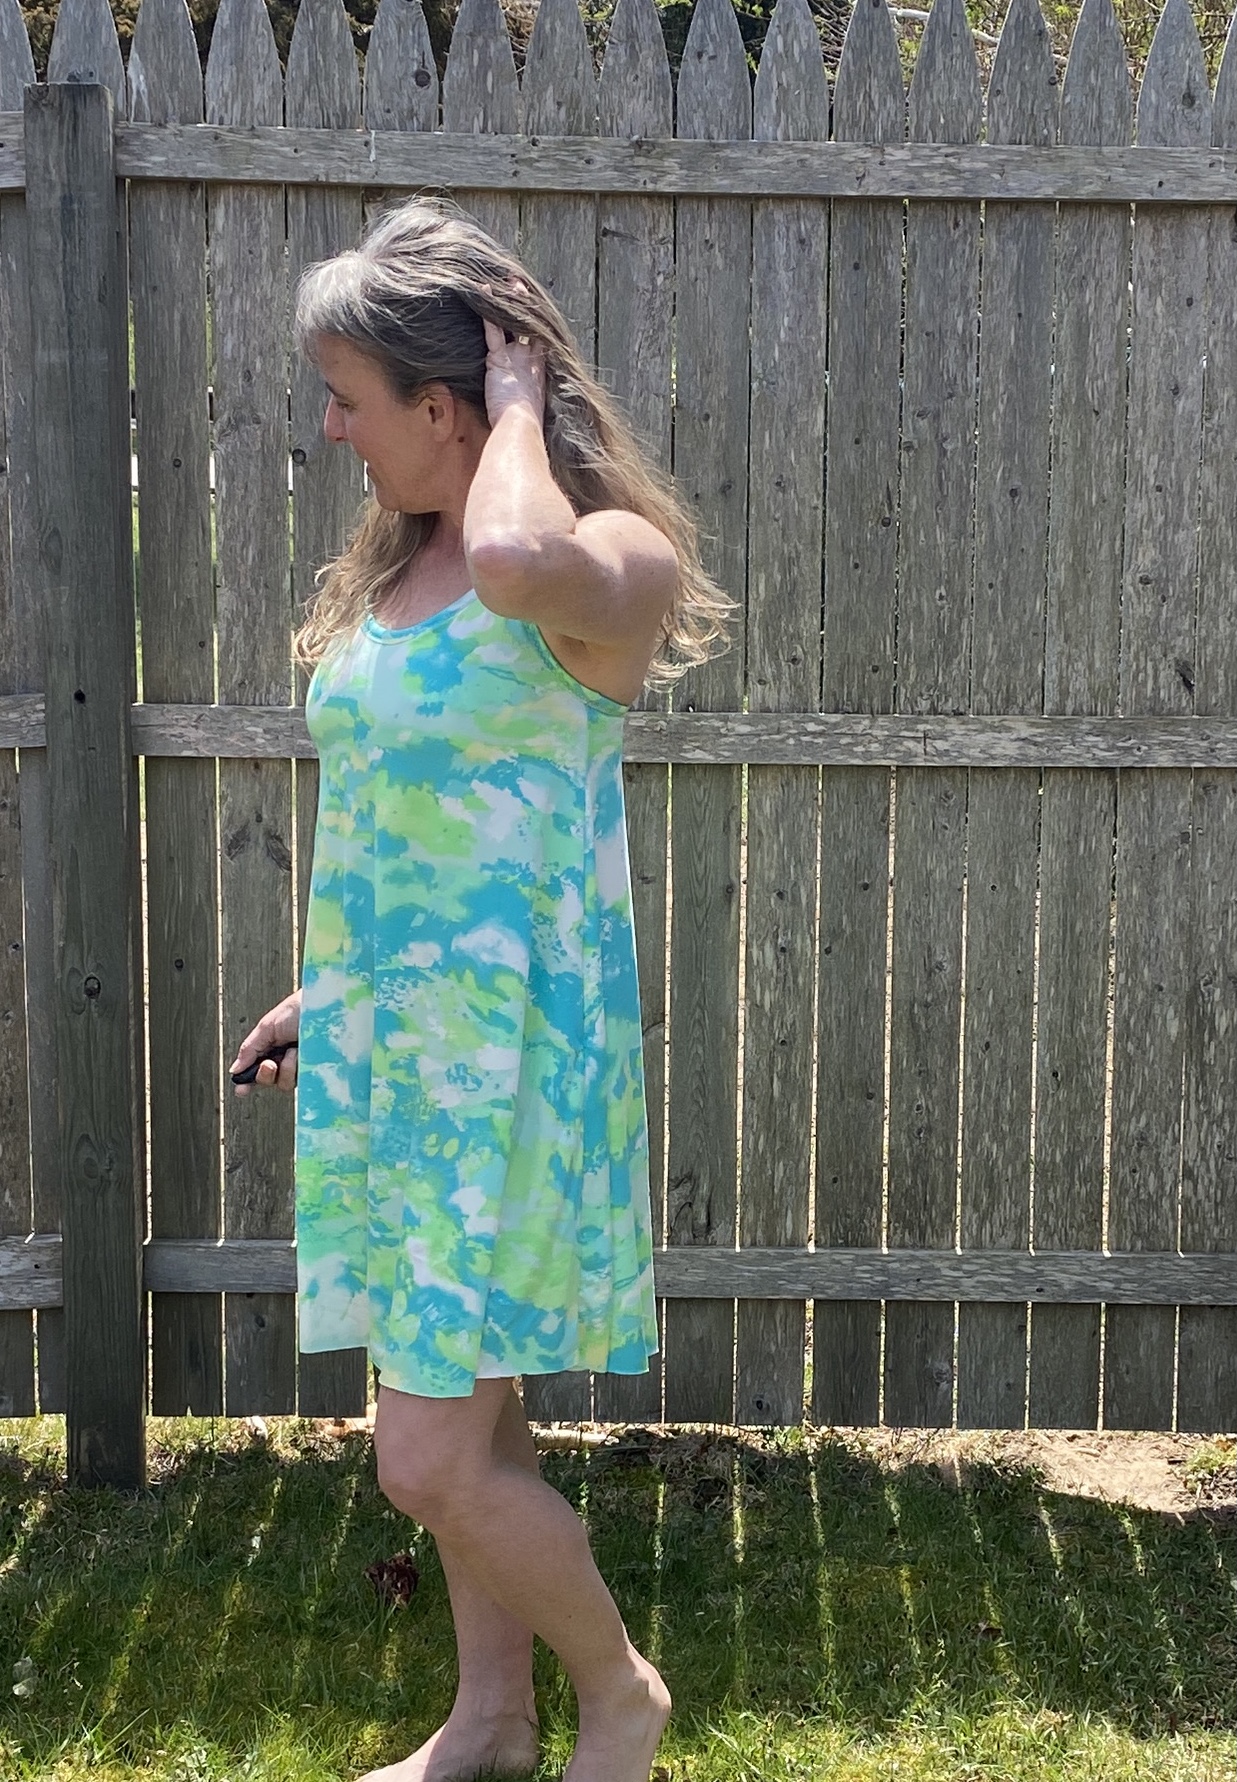
I tested the new Hannah pattern from 5outof4 (affiliate link) patterns in the dress length.  This pattern has so many options: bikini, crop, full length top, dress and maxi dress.  
    The bikini tops are cute in swim fabric and really have a fun swing to them! This is the first 5outof4 (affiliate link) pattern that I haven’t had to shorten the 3 inches in my torso that I usually do.  
This pattern is a lot like the Cecilia on top- close fitting through  the bust and then it flows!  Like Cecilia,  this pattern also comes with the optional bra and suggestions for adding support if you’d like that.  You can do wide or narrow straps and fold over elastic (FOE) is also suggested as an option.  You can cross your straps at the back like I did, or leave them straight and there’s a suggestion in the directions to add elastic in the straps if you like that support.

My fabric choices were not the best for this pattern.  After seeing a lot of other tester makes, it looks like swim fabric and thin, drapey fabric are the best option if you really want that swing.  This grey one is Jersey knit and while I love the feel, it’s a little thick and sticks out more than the drape I like in this pattern.  The multi colored fabric is dbp, which again is a little thick, but drapes a little better.  A knit fabric with some rayon would be really nice for this in a dress or maxi length!

There are instructions for hemming but I left the multi colored unhemmed because I don’t have plans to wear it out in public much.  I just don’t love the way the color are set in it.  In the summer, I take a shower after supper and then like to put on something comfortable but that I could leave the house in if I were so inclined.  This will be perfect for that and also maybe for sleeping in since I like to go to the garden as soon as I get up and this is fairly presentable.

I for the grey one, I just turned up the hem 1/2 inch and didn’t use a stretch stitch because there’s plenty of width in the bottom of the dress, so stretch isn’t really needed there. 

I struggle with finding the right support mechanism in the built in bra.  Cups always look weird and I’ve tried power mesh layers but I don’t get what I’m looking for.  The fit is fine but for my eye, there is an ideal shape I’m looking for and I have yet to find the fabric to do that!

With so many options, including a nursing option in all of the styles, I suspect you will have a closet full of fun new makes from this pattern!  Click for 5outof4 (affiliate link) patterns!


Saturday, February 18, 2023

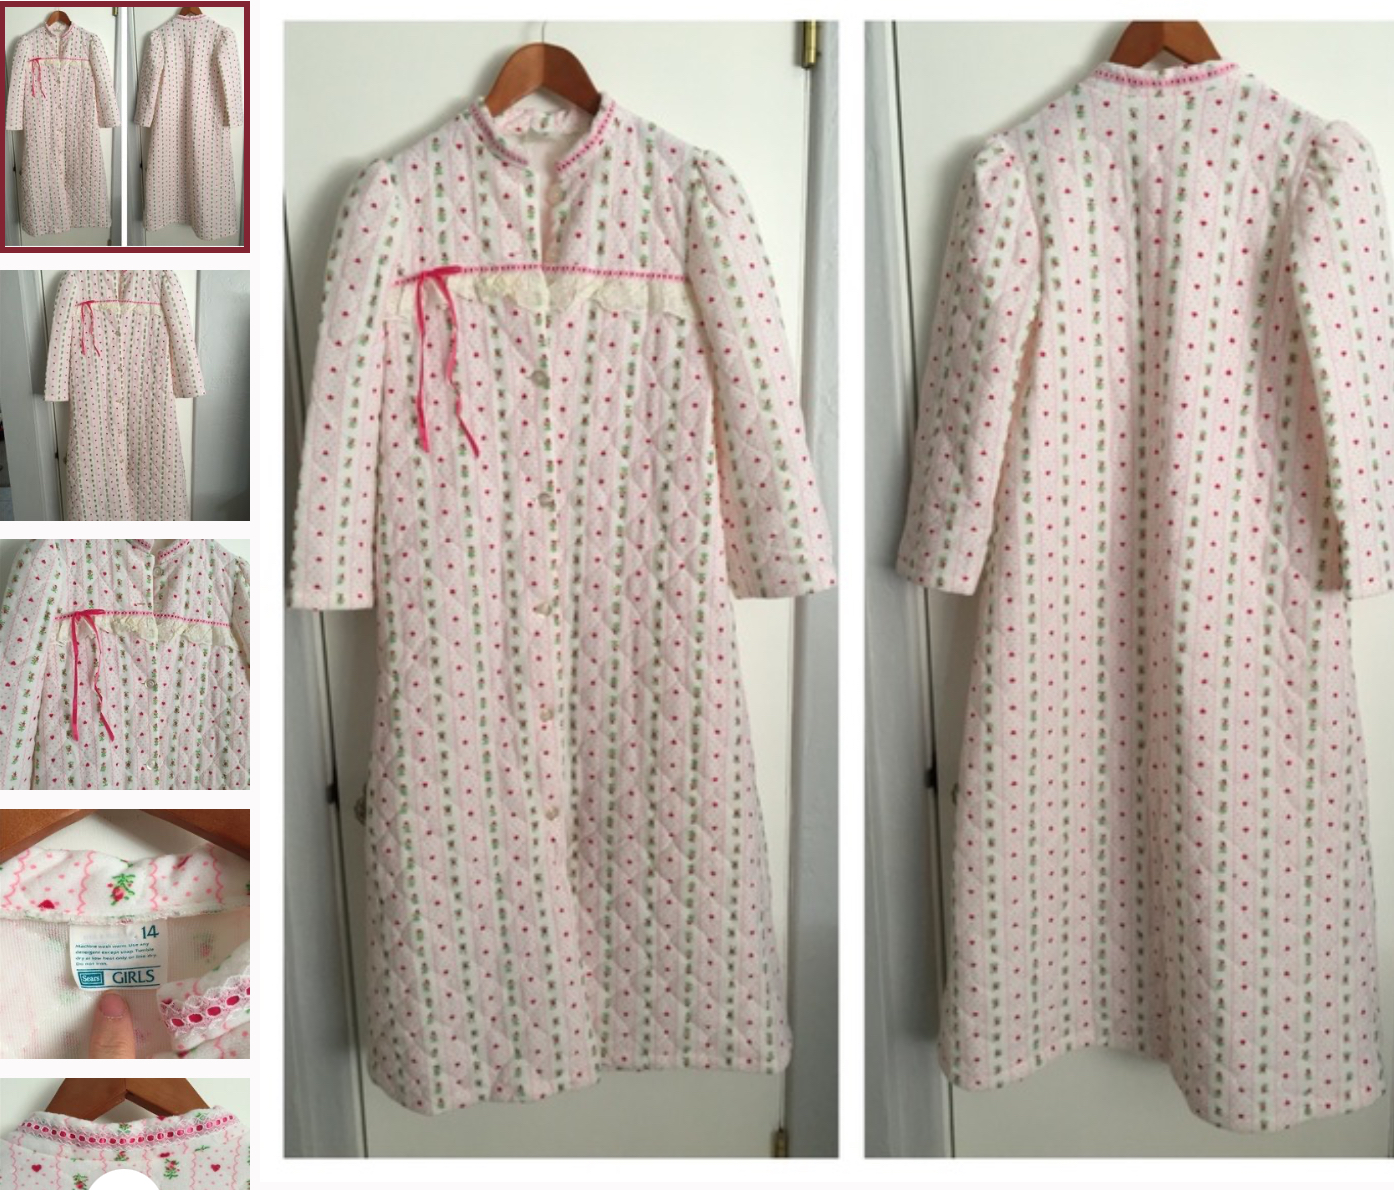
80s Bathrobes Scarred Me For Life

If you were a girl in the 80s, you might remember these robes.  My grandmother was a big fan of them and gave them to us several times as we were growing up.  I always wanted to like them, but they were polyester, they caught on my dry skin like today’s micro fiber towels do, and they weren’t at all absorbent. 

I always wanted to have a robe that I’d put on while I was still damp that would snuggle me in and keep me warm.  These robes had an itchy lining on the inside, like a mesh kind of thing, and they were not at all for post shower/bath snuggling.  We weren’t really a bathrobe family, so we didn’t go get out our pjs and robes to watch tv before bed or keep them at the foot of the bed to put on when we got up in the night.  We didn’t come for breakfast with our robes and slippers.  

I also remember trying to sleep in one once and almost burst into flames.  And speaking of flames, they were so polyester, that in the dry nights of winter, you could get some pretty amazing static electricity from these.  I vividly remember thinking I was going to catch on fire because there was static as I took it off once.  I was such an irrational thinker.

Once I went to college, I thought I’d need a robe for dorm showers and for the life of me, I can’t remember if I had one.  If I did, surely it wasn’t that quilted, itchy thing, but definitely made of terrycloth, like a normal robe.  I know that some time after college, I made myself a really nice terrycloth robe when Joann Fabrics still had it and I remember all of the mess I made sewing it together because it frayed so much.  But I also remember still never using it.  

I think my idea of the purpose of a robe was wrong. I thought you could just get out of the shower, put on the robe and the terrycloth would suck up all the water but somehow also be dry once it did that.  I figured I just always had the wrong kind of robe but even me 100% Cotten terry robe that I made didn’t do what I wanted.

Back in the early 2000s, we put in an outdoor shower. Never once did it occur to me that a robe might finally have a purpose.  Until this winter, I never really took showers in the winter but in early spring and late fall, a robe would have been a nice thought while walking back into the house.  Instead, I’ve always coming running, literally running if it’s cold, and coming into the house in a fit of rage that it’s so cold. 

Out of nowhere last month, the man said he always wanted a robe.  When I asked why, he said it would be nice for waking to and from the shower.  His birthday was coming up, so I immediately found one for such little money, I figured if he never wore it, it wouldn’t be much of a waste.  He’s been wildly in love with it and kept telling me how nice it is to have it on these cold nights when coming back inside.  He kept saying I should get one and I kept telling him how I’d never use it.

I’ve been taking showers outside most nights this winter because we have a new setup and it blocks the wind a little better than the old one.  When the temps are in the 30s, he runs down cellar and turns off the water so the pipes don’t freeze.  He is 100% diehard outdoor shower.  I am 65%.  Some nights, I just draw the line.

All of this to say, my new robe arrived today and I don’t know what I’ve been doing for the past 2 decades 😂. It’s no fur coat, but it made the walk back into the house something other than a shivering mad dash of swears. I was going to make one, but I couldn’t find what I wanted at Joann fabric and I’d don’t want to futz around with online companies because I wanted a nice thick robe and I wanted it ASAP.  I didn’t quite get the steal on this one that I did for the man but I definitely will use this every time I shower outside.  I still see no point  to it for inside showers and I don’t see myself wearing it while I get ready in the morning but for those cold outdoor shower nights, I’ve hit the jackpot!

Thursday, January 5, 2023

Nancy, Nancy Nancy!

woman wearing dress in snow
One of the first 5outof4 (affiliate link) patterns I made was the Nancy Raglan as a dress.  It had the cowl neck I was looking for and it was my first foray into sewing a sweater knit fabric.  It was also my first 5outof4 (affiliate link) pattern that wasn't an athletic wear piece and I was amazed at how many options come with it!  Cowl, plain neckband, hoodie- and then you can mash other 5outof4 (affiliate link) necklines with it and the options are even better!  A variety of sleeve lengths and a variety of lenthgs for top all the way to dress.

I find raglans to be extremely easy to put together because you don't have to fuss with the sleeve cap or anything else at the shoulder.  The neckband or cowl neck (I haven't made this hoodie but I've done hoods on other 5outof4 patterns (affiliate link) and they are easy) are also really easy to do.  

A lot of people like to do one fabric for sleeves and one for the main body but that's not really my style, so you'll see all of my examples showing one fabric.

woman and child sitting in chair
Just before Christmas this year (like the day before school got out) I realized I could use another red shirt to get into the spirit, so I timed myself making this one.  From getting the fabric out to cutting the fabric to sewing and hemming, this top took less than an hour to make.  I had enough fabric to make a dress but I was worried that this print in a dress might be horrible.  And I wanted to wear it year 'round, and I felt like a dress would scream Christmas, whereas a shirt would be more reasonable.

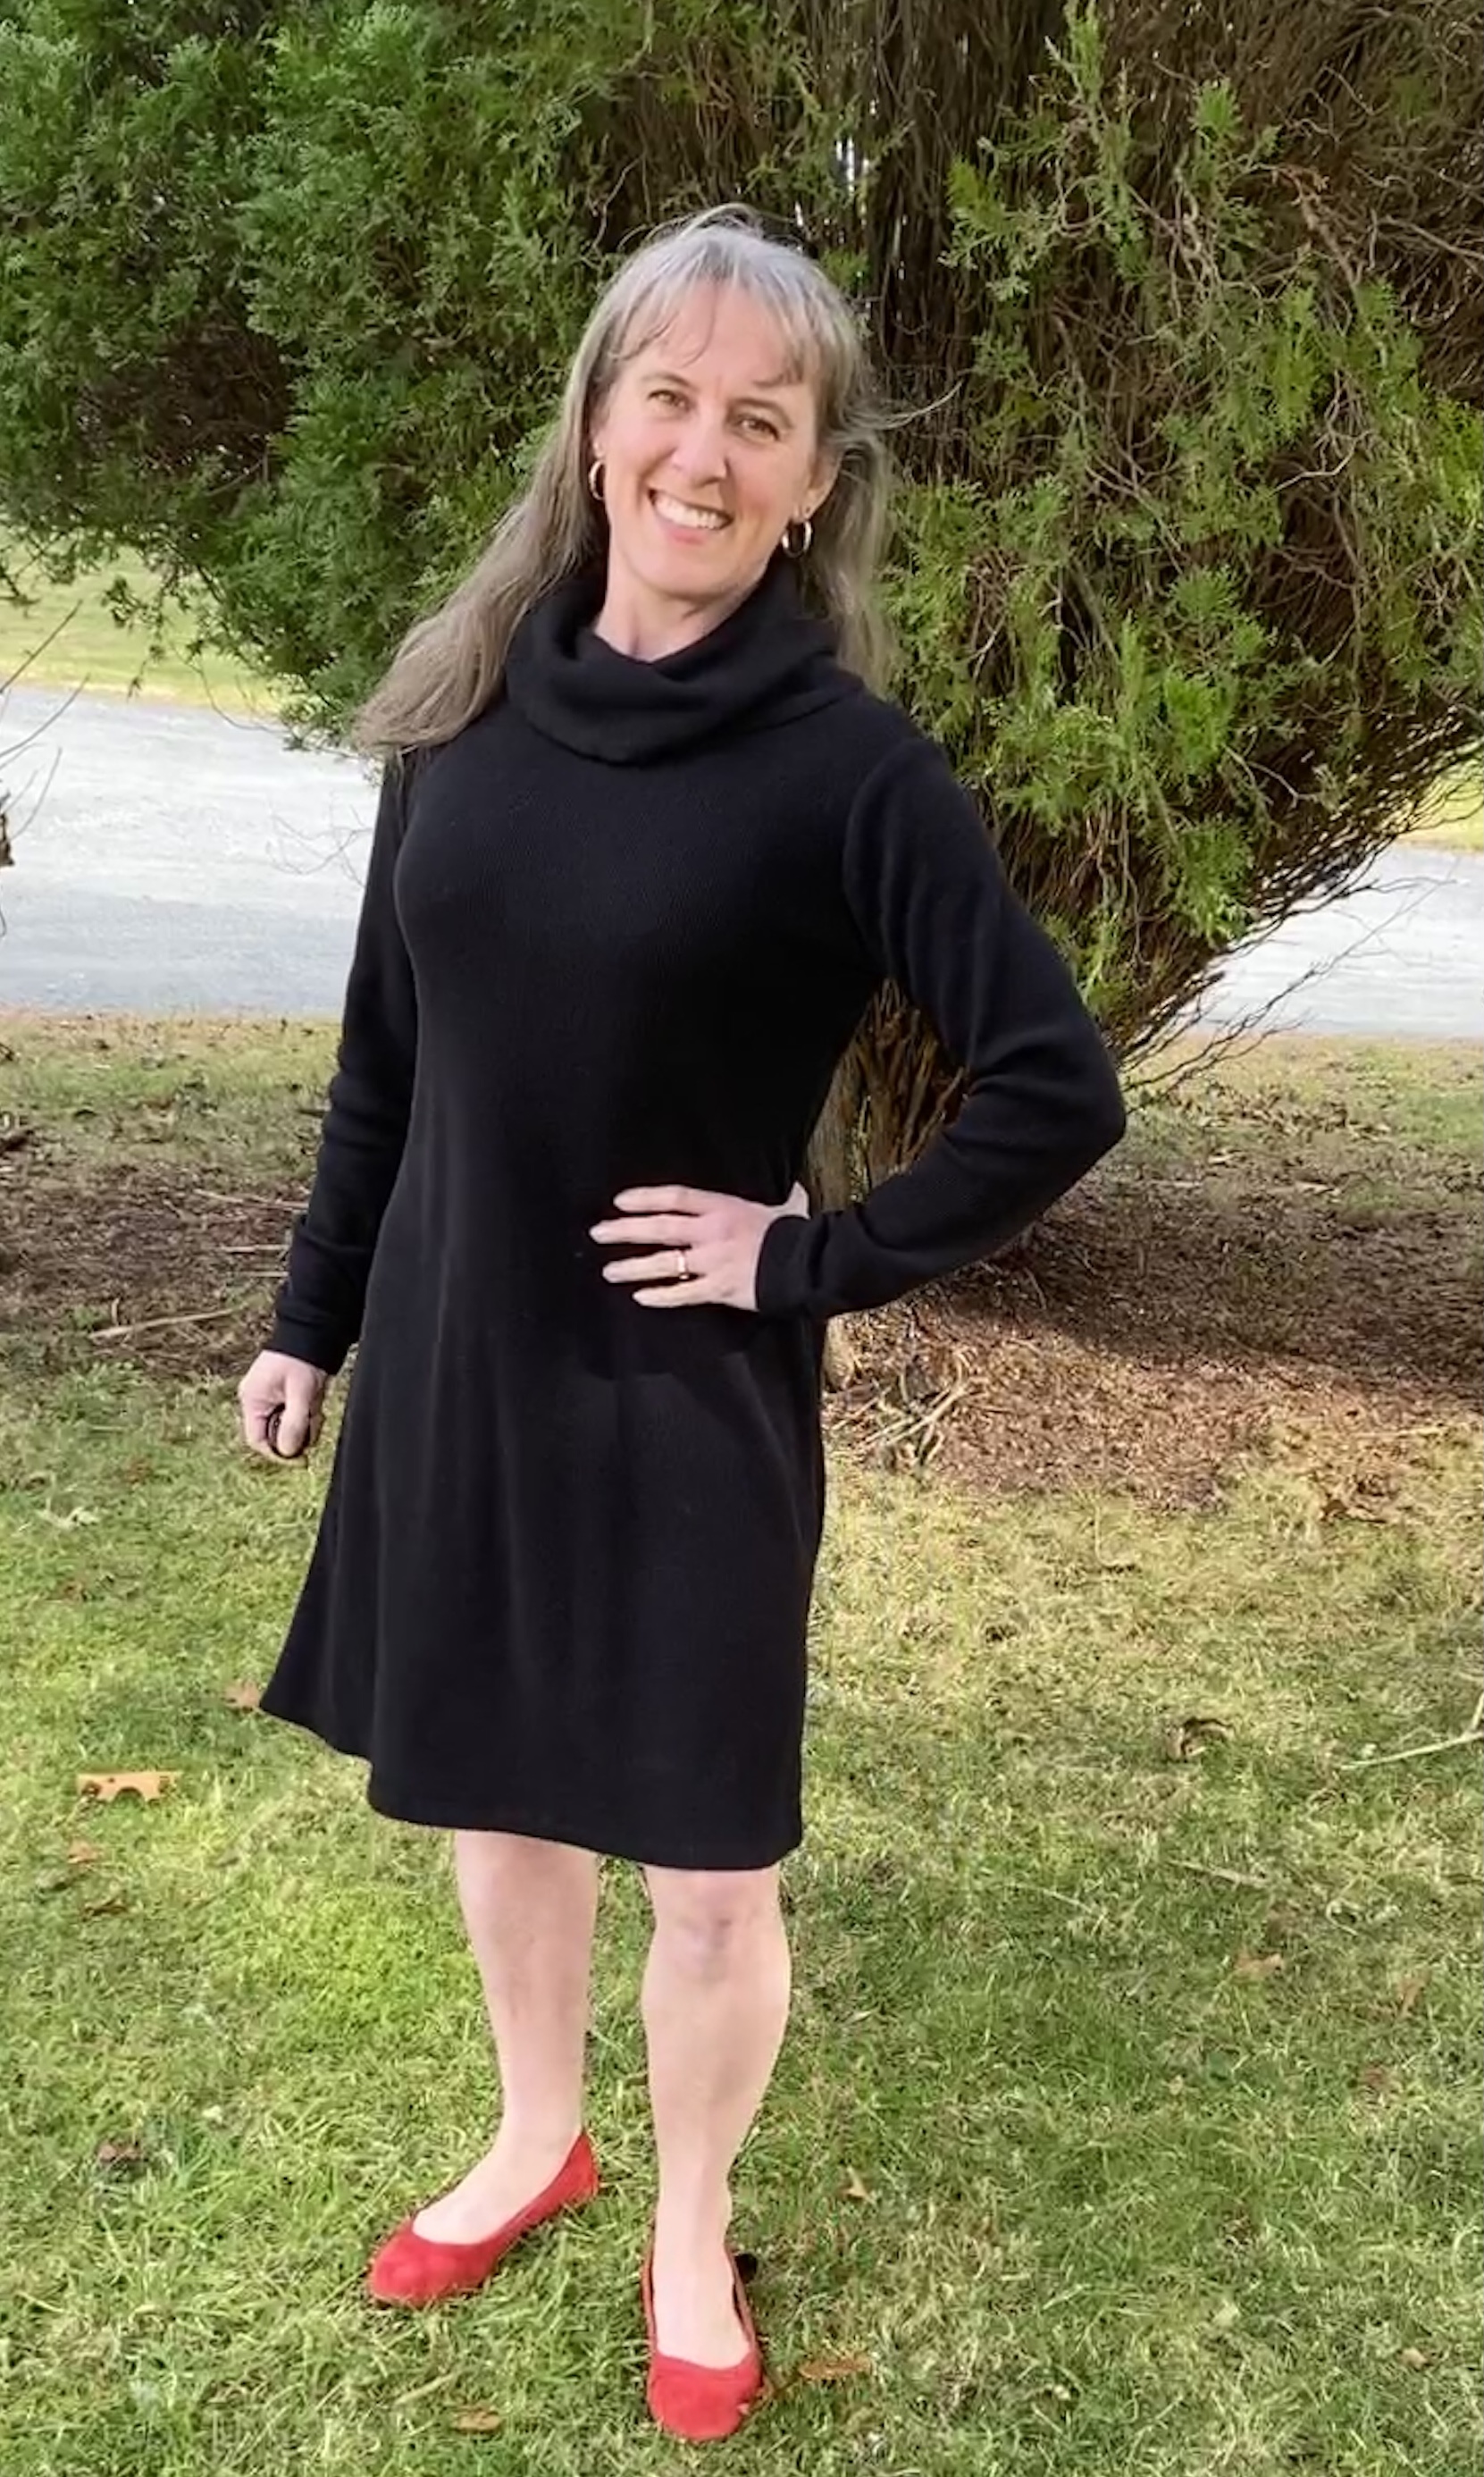
All of the knits I've used have been very supple and stretchy, except for this dress where I used a waffle knit.  The bodice of the dress is not the Nancy but the cowl is.  The cowl didn't quite do what I was hoping for on this be cause the waffle fabric is a little thick.  I should have used more of a funnel neck to get the look I wanted.  But, because this is a 5outof4 pattern (affiliate link), the Nancy cowl fit right onto the Easy Tee neckline, showing that these patterns really do work well together!

dress sewn incorrectly
The only issue I've ever had with this pattern is: because my arms are long and my torso is short, I often confuse the arms vs the body.  When I made this blue dress, the arms and the body were exactly the same length so I assumed I was putting the body together.  I had already made a couple by that point, but I can't tell you how horrified I was that the "body" was so small.  I couldn't imagine how I had put on so much weight in such a short time and it just looked ridiculous.  Nothing like my others.  

And then I realized I had sewn the sleeves together as the body.  I almost did this with the red shirt this year too but it's a shirt and not a dress so I was able to quickly catch myself.  See the correctly sew blue dress below.

If you're new to sewing knits and you want a stylish dress or top that is easy and has some options, Nancy is the way to go (affiliate link) .  Look at how many versions of this I've made!  I could also do a short sleeve but I just haven't gotten around to it.  There's also a nursing and maternity option, all in this one pattern!

Be sure to check out the Nancy Raglan and many, many  more on the 5outof4 website (affiliate link)!  
woman modeling red and white topwoman sitting

woman standingwoman modeling blue cowl neck top

woman modeling black and white top


Tuesday, December 6, 2022

Easy Tee With A Nancy Cowl

Do you ever buy a pattern because there’s a specific part of it you want and you never bother to notice the other parts?  I do this more than I realized and I’ve discovered it because I’ve made a few things recently that I thought I was going to have to mash patterns together or finagle something and then after asking around, it turns out some of the patterns I have already do this!  This is exactly the case with my Halifax Hoodie/Brunswick mash last month.

I’ve been itching to make a winter dress from some thermal fabric but I wanted a turtleneck/cowl type of neck.  My first outrageous idea was going to use 3 patterns, from 3 completely different designers.  It was going to be an undertaking but I thought it needed to happen.  I was going to use the cowl from Nancy Raglan from 5outof4 patterns (affiliate link) and stick it on a t-shirt neckline from someone else, with a dress length from someone else.

Somewhere along the way, I looked at the Easy Tee (affiliate link) and realized- there’s a dress already drawn out!  I completely forgot about the top, tunic and dress lengths of that pattern because when I made it the first time, I only cared about the t-shirt.  This took 2 patterns I was going to use and made them one.  And I was happy to see that the dress was draw with a wider A line than the other one I was going to use, so that was even better!

The Easy Tee (affiliate link) has a hood, but a hood isn’t where I was going for what I had in mind.  I remember seeing a dress once that had a great turtleneck that was full like a cowl (not skinny right to the neck) but didn’t dip down like a cowl. Do you think I can find anything like that now, even with the amazingness that is a google search?

Side note.  I made a Halifax Hoodie from Hey June once in a quilted fabric that was amazing until I did the cowl and it was such a thick fabric, it was like a giant neck brace.  I couldn’t make it dip, there was no folding or fluffing, it was just inches of a cone standing up around my neck.  I thought  it would be so pretty and holiday like with the off white and gold.  I don’t even want to talk about what I did to try to cut it down a little and wrestle it into submission.  It has moved along to an unsuspecting person through the donation box.

Back to the matter at hand.  I was slightly afraid that this thermal fabric might end up recreating the cone of despair just mentioned.  I have a Jalie pattern with a turtleneck that I didn’t even look at because I know is a close fitting neck.  The Nancy cowl (affiliate link) seemed a little floppy for the fabric but time was marching on and I didn’t want to keep looking for a neck I might have just made up in my head.  I figured it all else failed, I’d have yet another cowl in my lineup.  I like them, they are fine, I just don’t want to be that weirdo who only has one style all winter.

One thing I like about knits is how easy it is to mold them into what you want.  I knew if the Nancy (affiliate link) didn’t quite fit the top of the Easy Tee neckline, I could wiggle them enough to get them to line up.  I could have measured the neckline and the cowl bottom but alas, I did not.

One of the things I do not like about knits is how stretchy they can be and can easily get out of control.  This waffle/thermal fabric is nice but my serger made it grown by leaps and bounds, even when I adjusted the differential.  I ended up sewing it all on my regular machine with the walking foot, but not before I had managed to stretch the neckline of the tee from crew neck to practically boat neck.  Just handling the fabric was like adding water to a dried sponge.  It just kept growing.  The bottom of the cowl is a lot wider than it should have been due to the super stretched neckline.

I foolishly thought topstitching the cowl was going to do something.  I don’t even know what I thought it would do.  Keep things under control, I guess.  What it ended up doing was stretching and rippling it so much that even once I had removed the topstitching (black thread on black thermal- please sends your words of comfort) and washed it and dried it, the ripples are forever.

The neckline sort of does what I envisioned.  I played with it as I wore it and got it to a state that I like.  It’s not quite as cowl-like as the pattern intends but also a little more cowl-like than my imagination had hoped. If I made another, I think if I brought the top of the cowl piece in a little bit, it would allow it to old a little closer to the neck.  The line drawing has it tipped out a little at the top which is what allows the finished cowl to do that dip.  These are the kinds of things I can only understand by doing it and seeing the result.  I tried to imagine how that shape played out in the finished cowl but only now do I understand.  I have a very hard time envisioning 3D without holding it in my hand.

The dress itself is super easy.  Just a front and back and the sleeves.  The sleeves are not side specific so again, really each because you don’t have to keep track of which one goes where.  I ended up putting cuffs on my sleeves because with the tendency for this fabric to grow, I knew that even hemmed, these sleeves would end up a mile wide by the end of the day.  The cuffs slow that down a little bit.  I also like a longer sleeve because nothing bothers me more than a sleeve that is too short as I reach my hands forward.  I’d rather have a little extra fabric than not enough.

For the hem, I used a hem tape before topstitching.  I usually don’t like a hem tape, but I couldn’t imagine ironing and pinning  a good hem without it being 6 miles long.  That was definitely the best solution because it lays exactly as I wanted it to.

The Easy Tee (affiliate link) has a great cut that’s flattering but not too loose or too tight.  I’ve made a couple of t-shirts with the short sleeve option but this was the first long sleeve or dress that I made.  I would try another turtleneck or cowl neck on this pattern because if I had fabric that behaved better, I think I could achieve the look I originally started out wanting.
This Easy Tee and Nancy mashup were my ambassador make for 5outof4 patterns for this month.  Get your copy of each pattern here (affiliate link)!

Monday, October 10, 2022

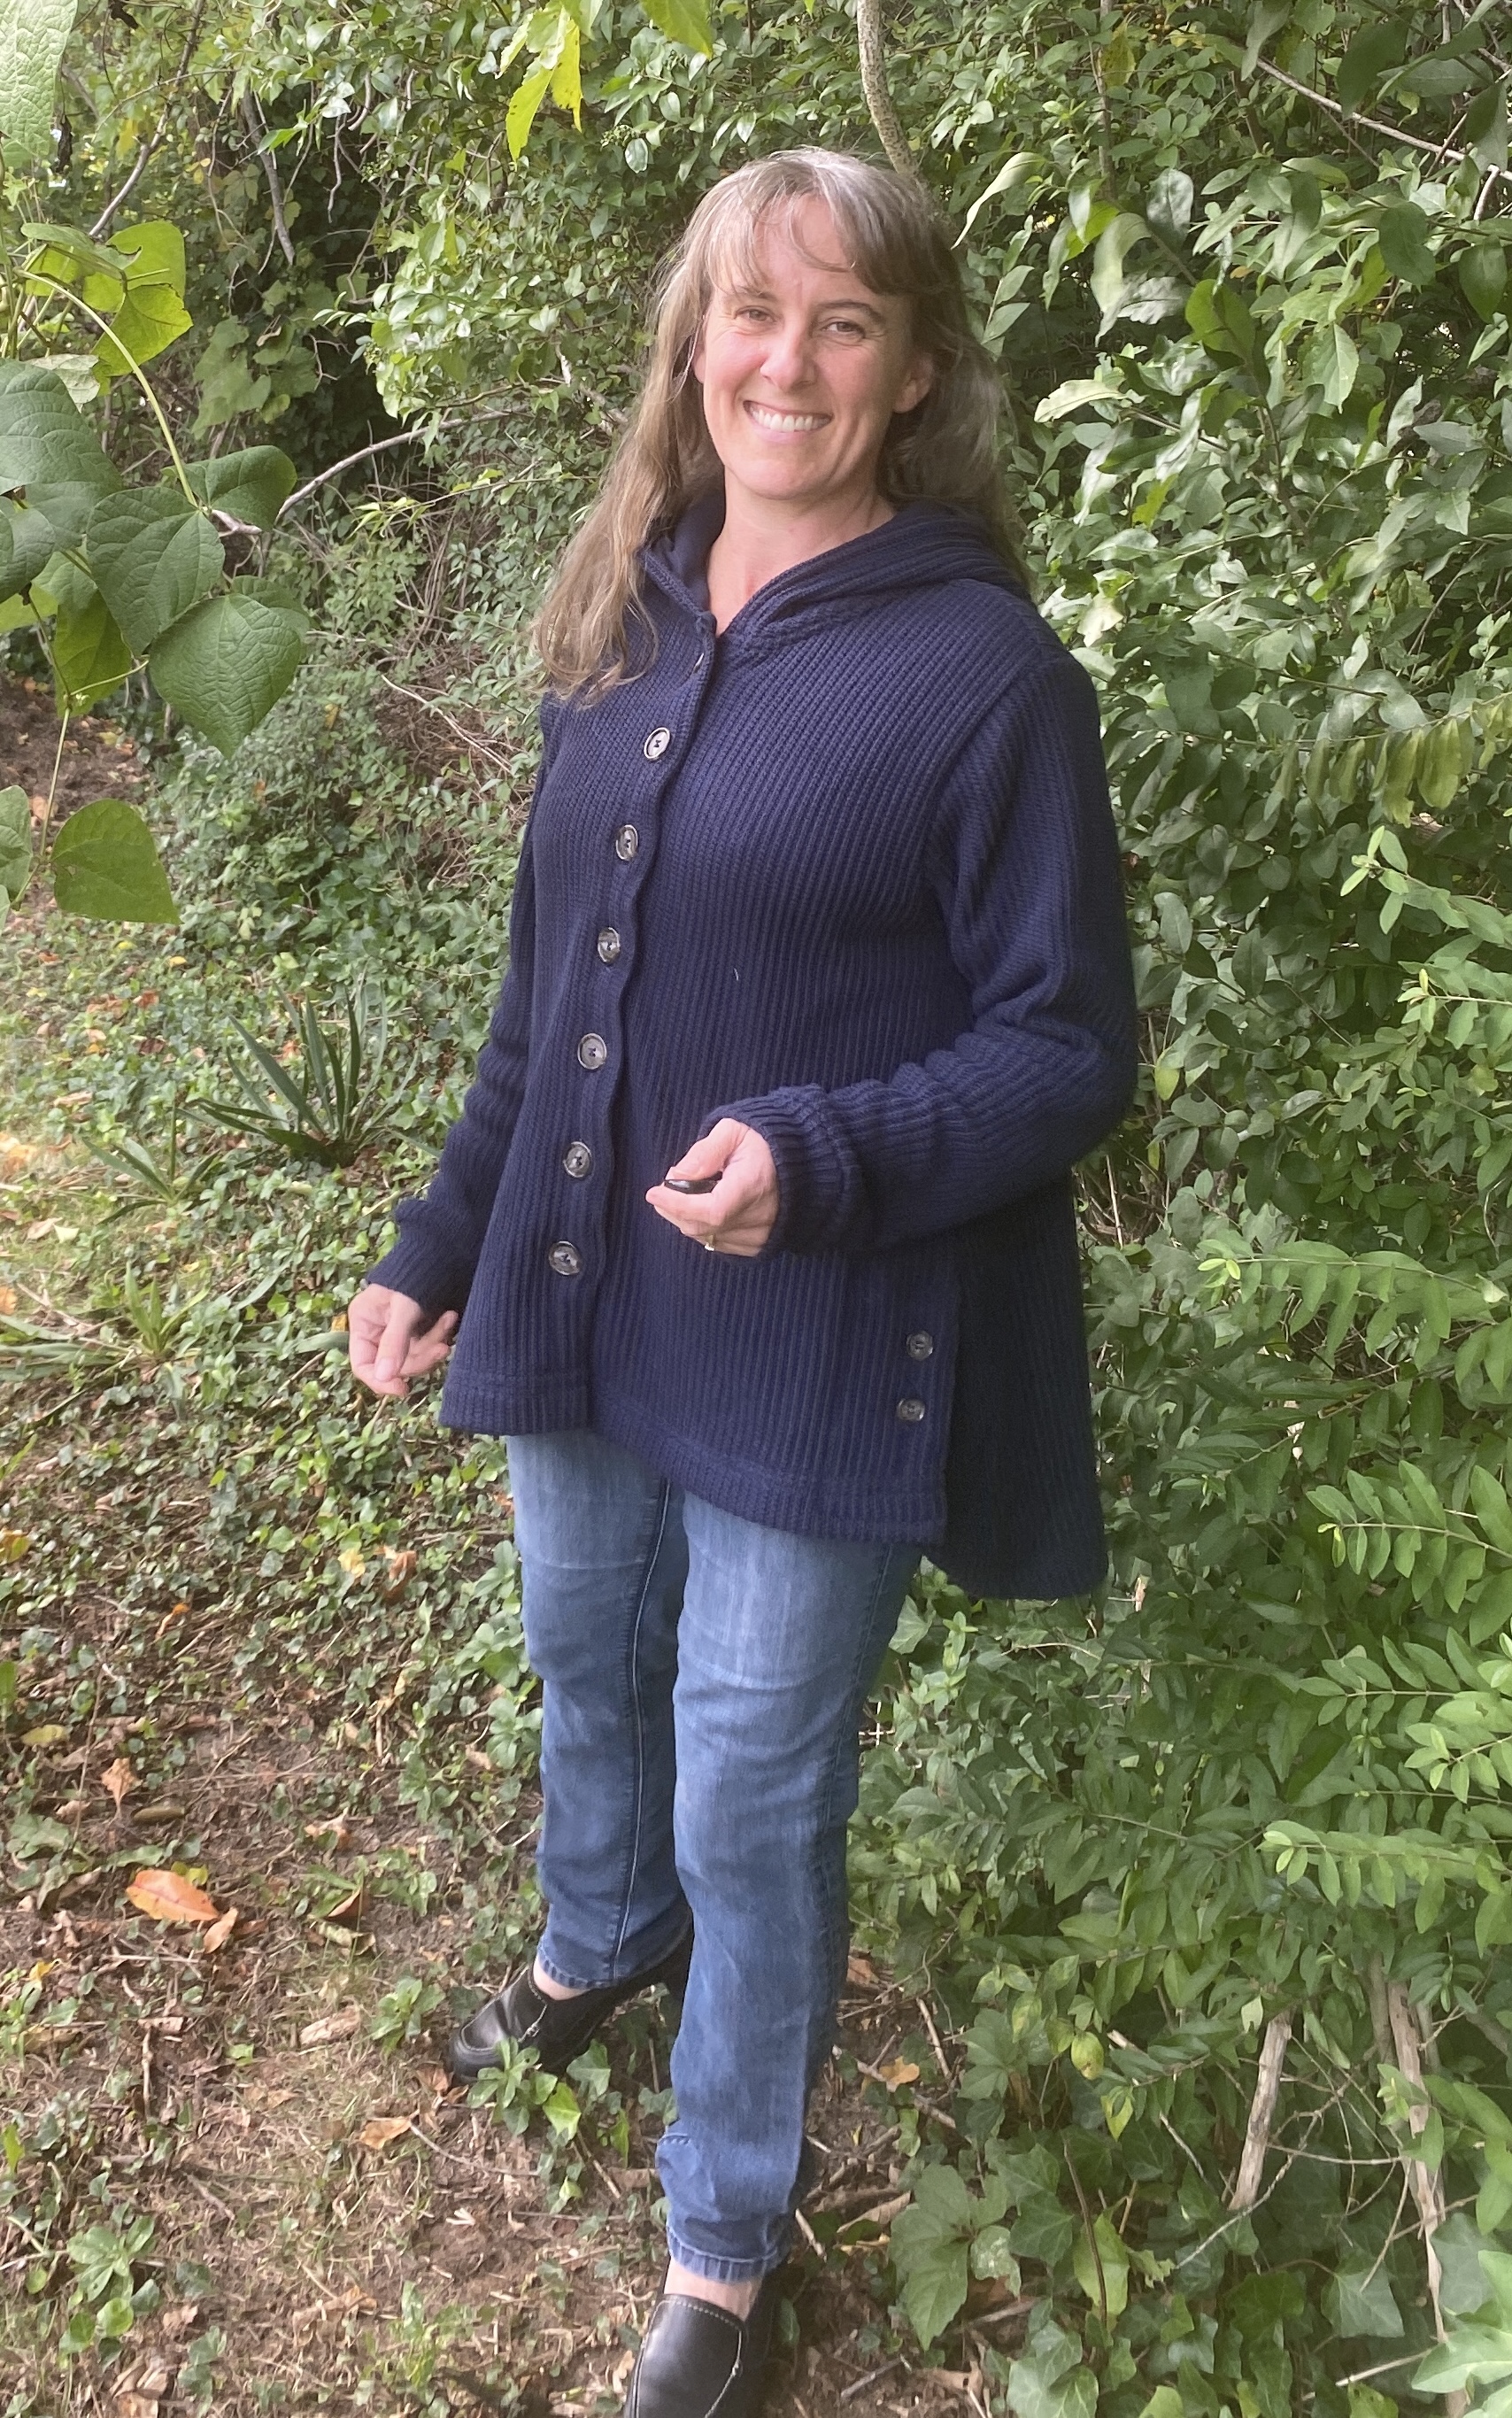
Halifax Hoodie Sweater Jacket Hack With A Brunswick Flair

I’ve had an idea for a sweater jacket since I saw this advertised last year.  I really wanted there to be a pattern already drafted that had all of these pieces so I wouldn’t have to hack my way to what I wanted.  I searched, asked in some groups I’m in and asked all of instagram and no one shared the perfect pattern.  Lots of people suggested using various patterns and adding what I wanted.

I sat on this project for a really long time.  If you don’t have time to read to the end, I got exactly what I wanted and it’s possibly one of my proudest makes.  

Be prepared for all the details and lots of pictures.

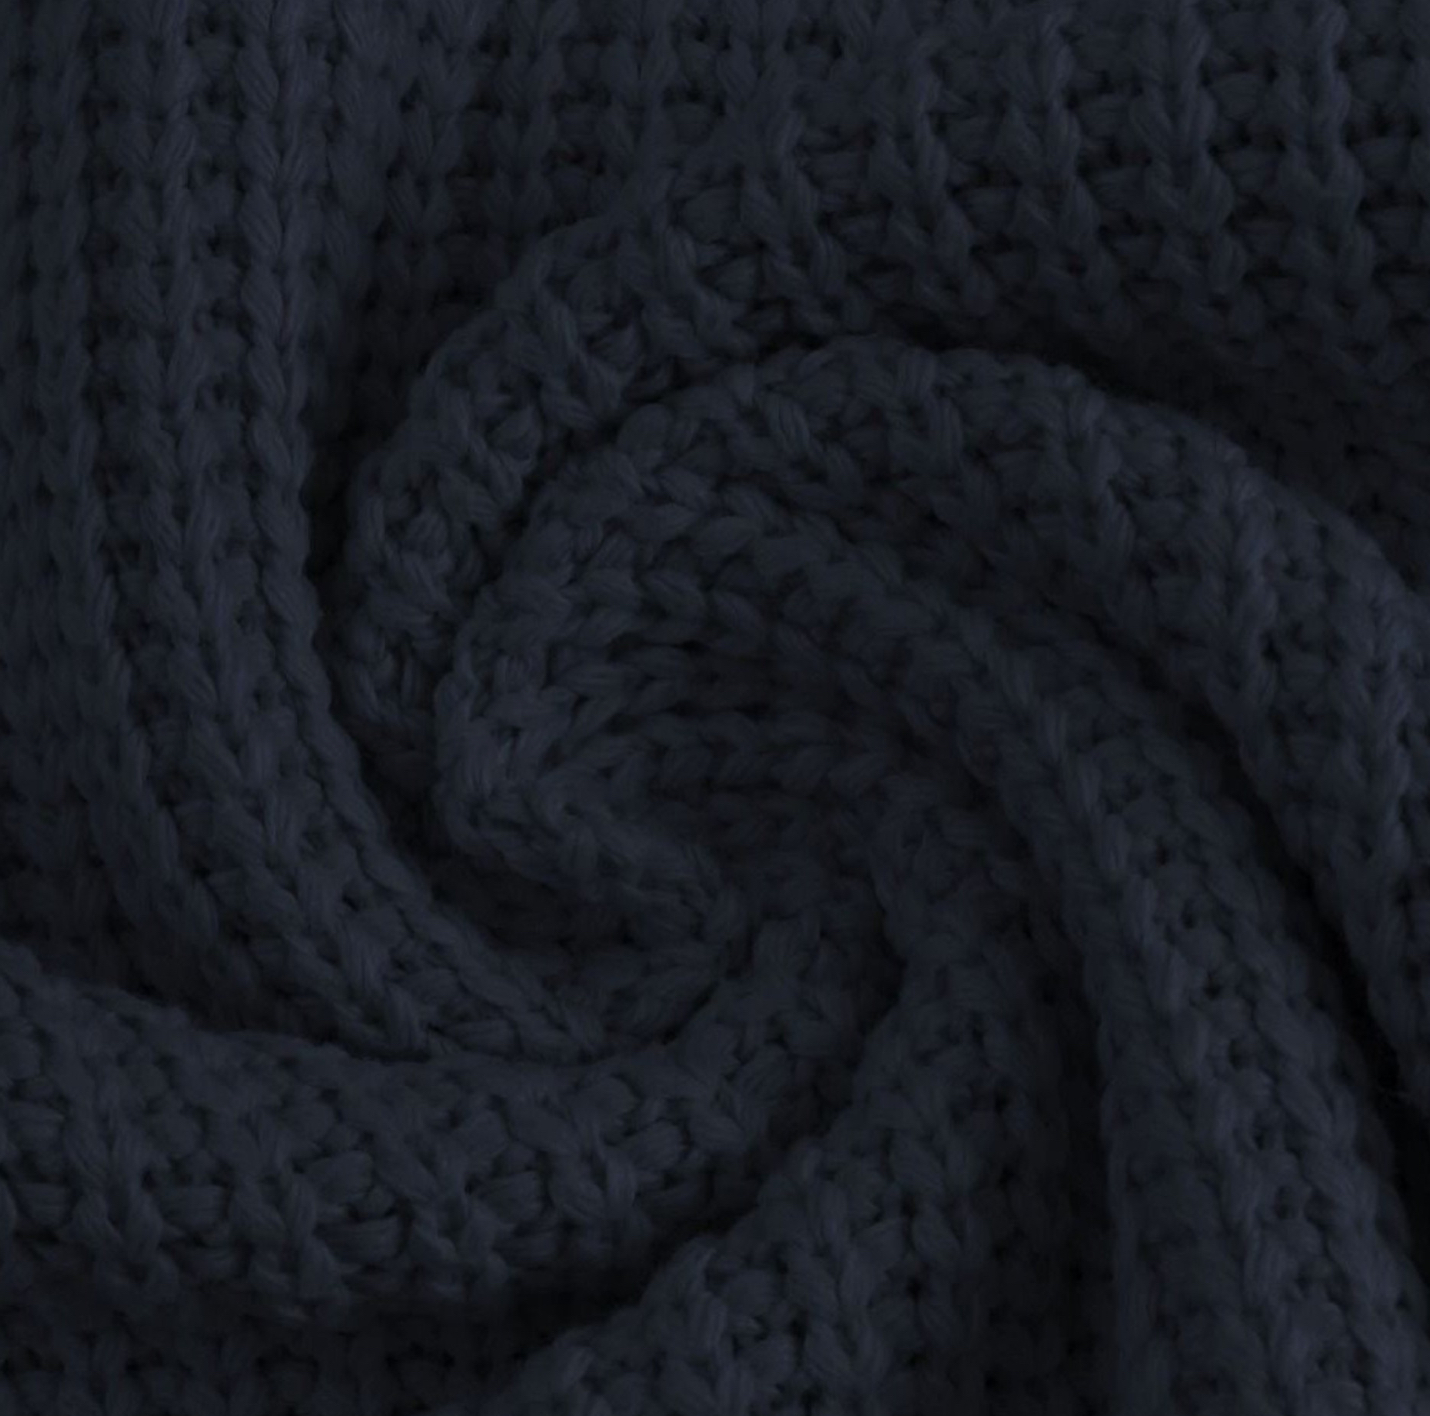
I bought this amazing 100% cotton knit fabric after my sister gave me a gift card to www.knitfabric.com for Christmas.  Then I was so afraid to cut it.  I needed to find the PERFECT style and get the fit right before I would even consider using the real stuff.

And then summer came and I let it go. I thought maybe I’d give up on the idea of making this kind of jacket and something else would demand to be made from the navy knit I was salivating over.  When it’s super hot in the summer, it’s really hard to think about sewing cold weather clothes and hacking patterns.  But about a month ago, the nagging started again in my head and I knew if I didn’t do it now, I’d never have something ready for cold weather.

I’m a fan of Hey June patterns and love the Halifax Hoodie.  I’m not much of a sweatshirt wearer so my two Halifaxes will probably get me pretty far.  Someone suggested using that as a base and maybe the Brunswick for the side vents.  

In my searching, many of the patterns people suggested had a dropped or dolman sleeve.  For what I wanted, I knew that sleeve style wasn't going to work.  I originally started with the Halifax because of the sleeve.

It wasn’t until I sat down to really tackle this that I even noticed version C of the Halifax is a zippered sweatshirt!  I couldn’t believe the good luck I stumbled upon because I knew I could finagle a button placket out of that and it already has the hood!  I didn’t want the kangaroo pocket or the band but I did want a curved hem, so I had to think about that how to achieve that curved hem. 


And THEN, I almost wet my pants with glee when I realized view E has a curved hem!  If there was ever a pattern I was meant to hack, this one is the clear winner because almost all of the parts are there!  Little did I realize that the back of E actually comes around the sides to give those angled lines but in the long run, and that part was a very long process, it actually helped give me the swing I wanted in the back!

I couldn’t use the E Front because I didn’t want lines to go like that, so I had to ask my sibling expert how to make the C front work with the E back because the armscyes are  quite different.  My first muslin had a funky thing happen at the bust and armpit but I think we got it straightened out for the final!

What did people do before text messages and facetime?  I know I could not sew like I do if I didn't have either of these ways to get help, ideas or just confirmation that I'm doing it the right way!

I added a little bit at the front on both sides because I wanted to fold the fabric under to make a nice solid button placket.  View C is meant for a zipper and I hadn’t made it so I wasn’t sure if there was enough room to do my folding and not make it snug.  I intend to wear this as far into winter as I can, so I need it to fit over clothes.  I added interfacing to both sides as I folded them under so my buttonholes would be secure and I also like to have it on the side where the buttons sit since they will get a lot of action and I wanted them to be secure.

Just look at this curved hem.  I used the tutorial for the side vents from the Brunswick pullover and somehow, the measurements worked perfectly.  I haven’t made a Brunswick and I don’t know anything about the sizing.  I’m going to chalk that up to the fact that both are Hey June designs and she’s just magical.  

There is something to be said about using patterns from the same designer.  I have found that my favorite designers usually have patterns that end up lending themselves to being blended together pretty easily.  I know a side vent is probably a pretty easy hack to add to any sweathirt pattern, and until this jacket, it wasn't ever a feature I'd considered.  I feel like side vents with buttons are well suited to tall people with long torsos and have no torso or height.  I thought it would be silly on me.  

I was so wrong.

The last time I made a coat, the arms ended up too snug so I thought about that a lot going into this.  I knew I needed to line this and it’s a knit so it would give more than my coat did, but the shoulder and armscye were still a big worry for me.  I ended up doing a large in the front and back with a medium for the sleeves and I’m surprised it worked out so well. In the hoodie, I do a straight medium and it’s great for a sweatshirt.  I knew I wanted a little more room for this to be wearable as we head into winter.

I lined it with a cotton knit with just a little stretch and I think it’s helping everything stay in shape.  This jacket is really heavy and I think it could easily run away, but the lining and the binding of some of the seams are keeping a lid on everything.  I thought I was going to make the outside, make the lining and then sewing them together and have it all clean with no showing seams.  I realized right away this would be more work than I wanted to do and the fabrics stuck together really well so I wasn't going to lose the lining fabric if I tried to use them together as one piece.  My initial plan was to bind all of my seams but that got unwieldy at the armscye, so the hood and hems are all I ended up binding because that's all you'll really see anyway.

The hood is lined too.  I’ll never wear the hood up but I love the look of the hood when it’s down. I debated putting a channel for ties for the hood but decided it isn’t worth it and I like the cleaner look without the ties hanging down. 

The only thing missing is pockets.  I couldn’t figure out where I’d put them with the side vents being kind of where I’d want pockets.  I’m ok with no pockets. I don’t really put things in my pockets but I like to place my hands there.  I can just hook my thumbs in the side vents😂

You might be wondering how well this fabric plus the liner moved through my machines.  One serger needle broken, one jeans needle broken and two machines almost thrown in the trash because of buttonholes, but we’re good.  My Bernina 350 has an automatic buttonhole but the foot wouldn’t move properly over this fabric so I had to go back to my Bernina 1001 and do it the manual way.  I wasn’t pleased because there are A LOT of buttonholes.


I knew buttonholes would be tricky but the trickiest thing was the navy blue with the perfectly matching navy thread.  Great idea for final product but a nightmare when trying to rip out thread or just trying to see what you’ve already sewn over when making a buttonhole.  I ended up getting blue painters tape and taping down the front so I could draw the buttonhole lines.  This was a game changer until the tiny bits of tape got stuck in the thread.  I’m still pulling it out😳  Buttonholes were really the only issue I had with this whole jacket.  

I wore it  for a week without buttons because I didn’t have time to make the buttonholes.  It’s much better now that it can stay closed! 

This is probably the first time I’ve winged it with a pattern and really had a final result that I had pictured from the beginning.  And I’m really glad it was all mostly the one pattern so I wasn’t going too far to make this happen.