I grow things, I ride things, I bake things, I can things, I sew things and I make things. Sit with me on Aunt Mildred's Porch to witness this crazy journey I call my life and share the fun, laughter and utter foolishness that I come across from day to day.
Monday, January 13, 2025
Pattern Testing Is Not For the Weak
Saturday, January 4, 2025
These Boots Are Made For Walking
I might have reached the pinnacle of my sewing career because..... I altered boots!
Saturday, December 28, 2024
What's Old Is New
An idea started brewing that maybe I could make a couple of throws out of the squares and give them to his mother and aunts and uncles for Christmas.
In case you're new here, one of the many things I learned how to do on Aunt Mildred's porch (this is where the blog name originated, by the way) was crochet and I was pretty sure that as long as all of the squares were done, I could put them together to make something. If I had had to actually make more squares, that would have been a bigger challenge since there was no pattern included and I haven't done this specific kind of pattern before.
I also like to take on challenges because I'm a sucker for complicated things. This didn't appear to be complicated, but they never do.
I planned to work on it in the summer, when I could work outside and let everything air out because everything was pretty musty smelling. Imagine my surprise when it was November and I realized I had never taken them out of the box, let alone aired them out or put them together.
Or even looked at what was really in the box.
I decided I really couldn't do anything until I at least washed all of the squares once. This would start to get rid of the musty smell and mold spores and also tell me if they were going to survive or if they were too delicate. I had a feeling they'd be just fine.
I put them through one wash and dry cycle so the initial mold spores would wash and dry out but the smell lingered. It wasn't awful, and I knew I could work with the squares and still breathe, but I had to also figure out a way to get more of the smell out.
I was shocked to find she had already sewn most of the squares into 5 square strips. This made things much more clear and I knew it would make the whole thing easy to put together. The first thing I had to do was decide how big I would make these throws so I could figure out how many it would make.
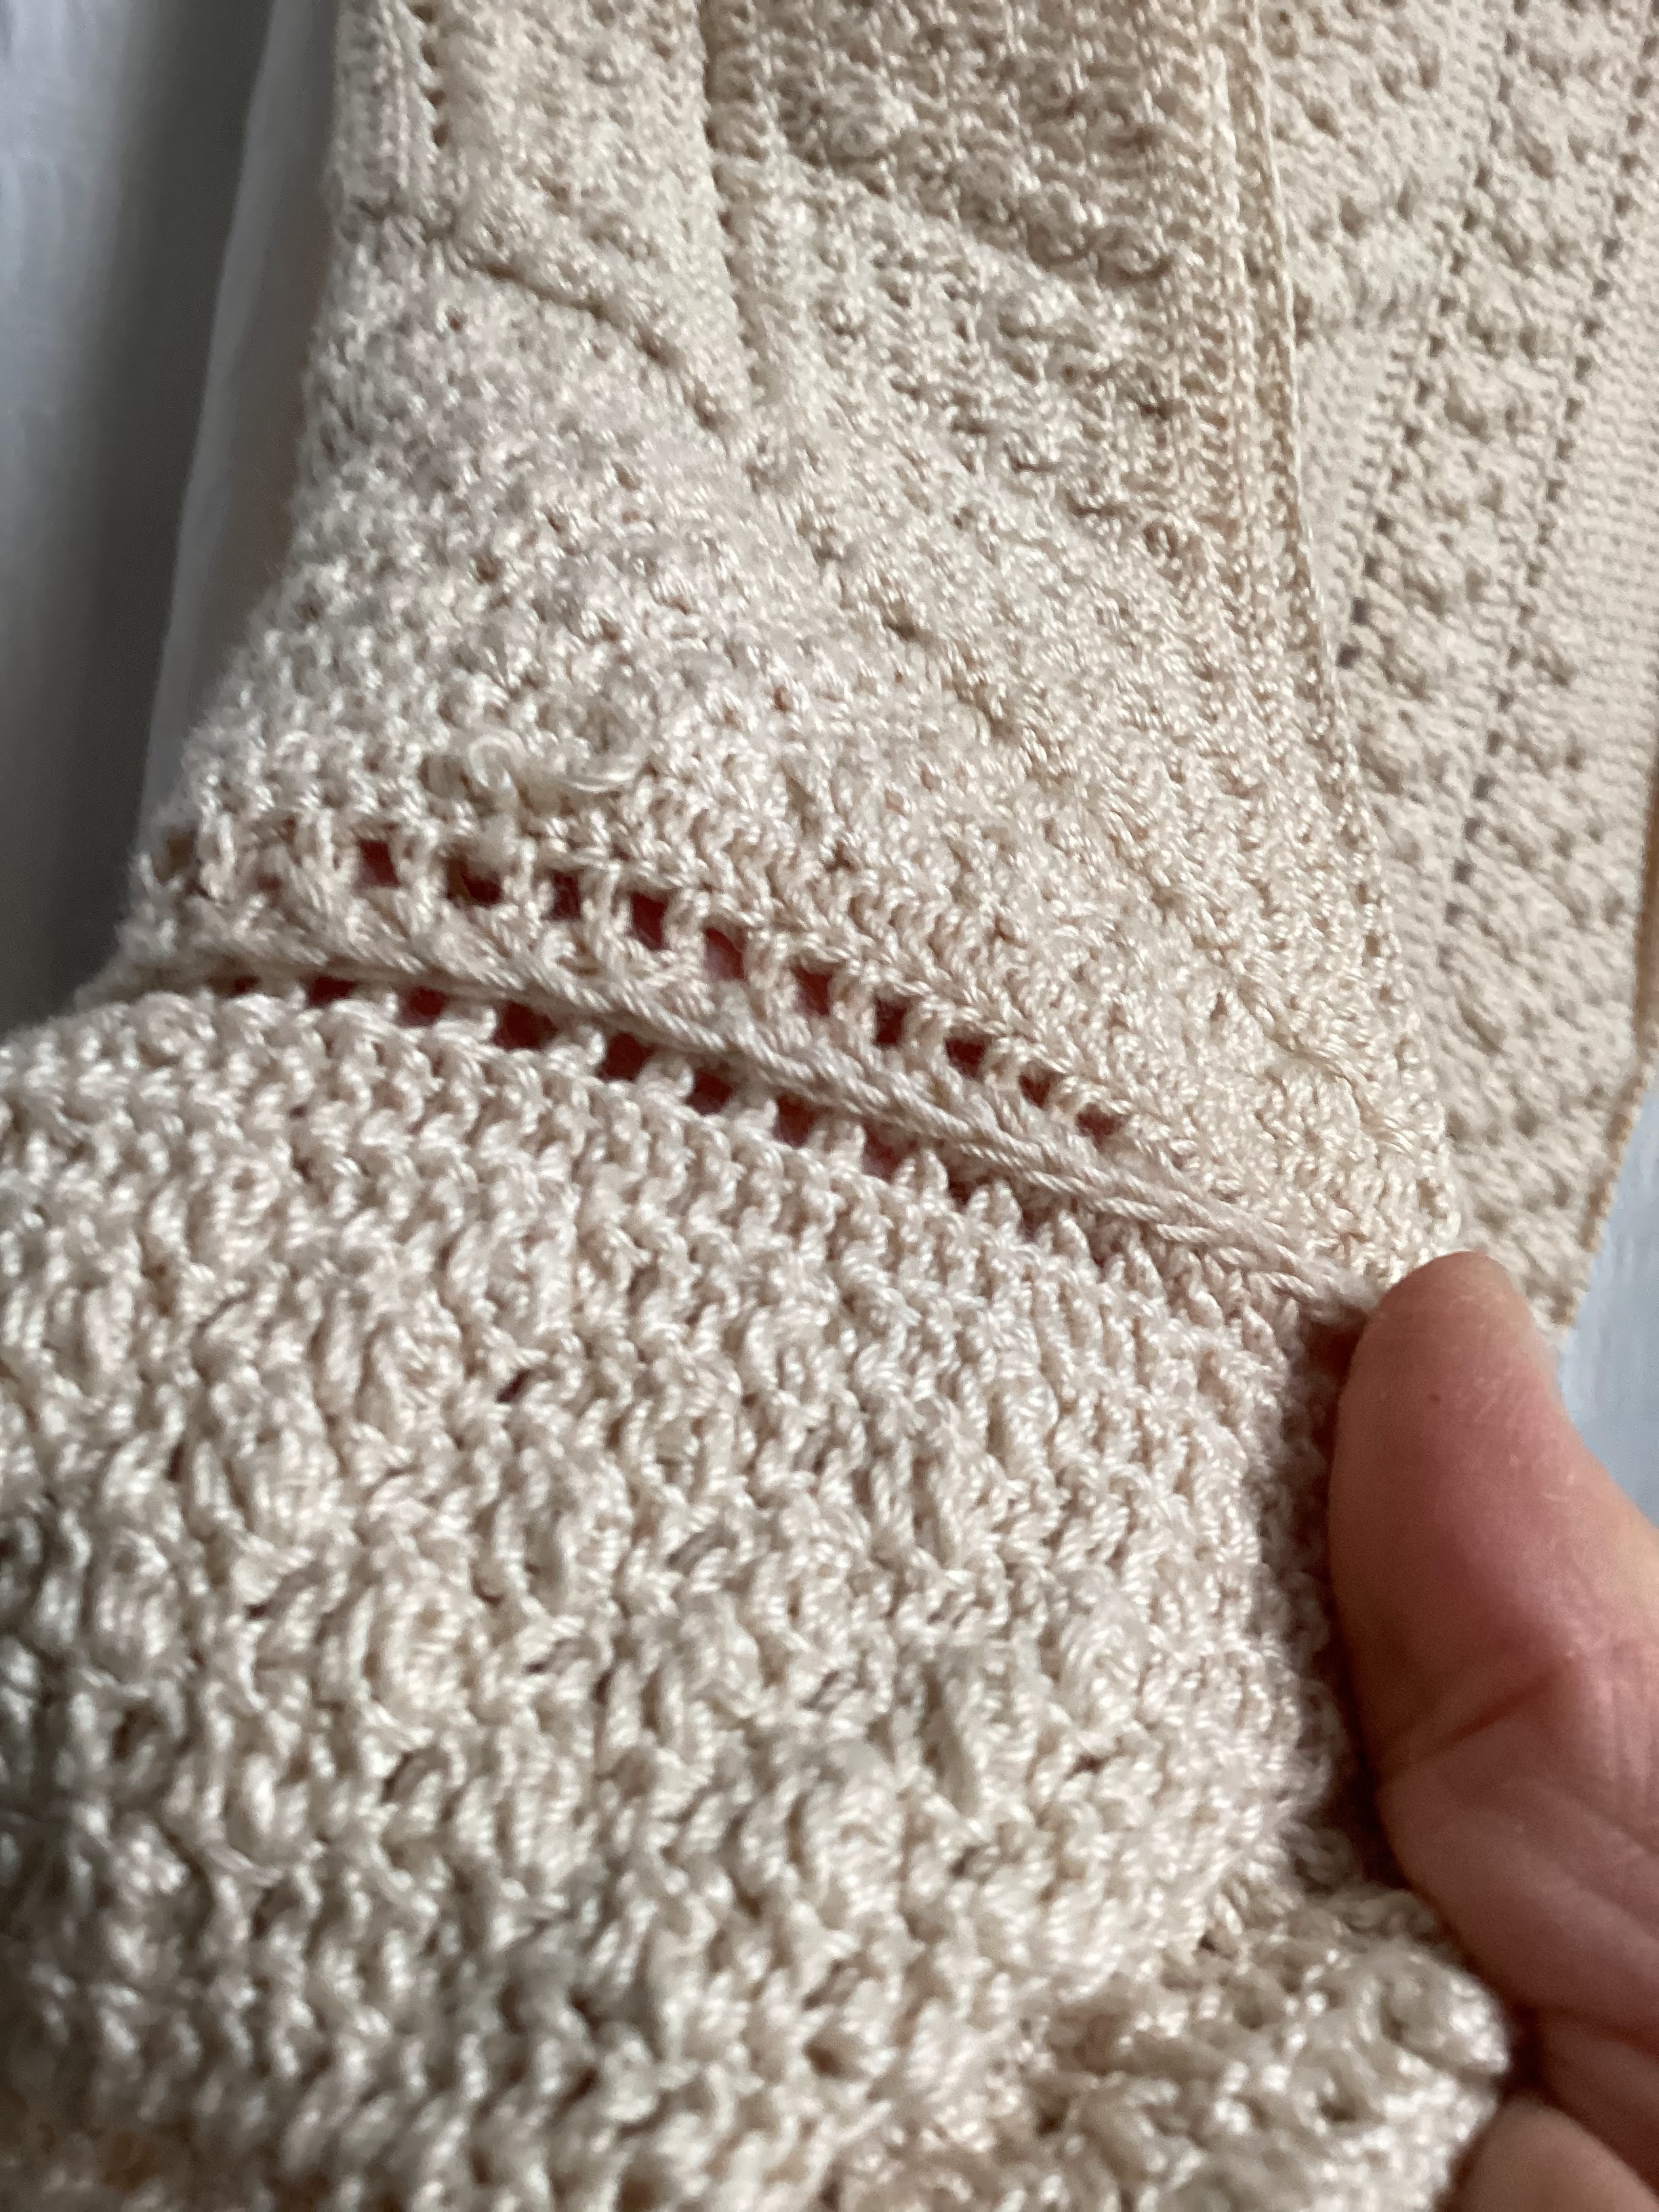
After everything was washed and dried and I knew how many strips to put together, I had to figure out what size crochet hook she had used to put the strips together. You can see the stitches are very tiny. I have a lot of hooks but even my tiniest one wouldn't do anything that small. I'm a pretty tight crocheter but my smallest hook and tight hands made stitches that were too big.
Sunday, December 22, 2024
From Nightgown to Night on the Town
I used to be a huge fan of these floor length flannel night gowns. I had two of them and I remember wearing them in the winter, under the duvet, and not being hot. Somewhere along the way, I must have changed the duvet and it's much warmer because I can't even imagine wearing a flannel nightgown to sit on the bed, let alone to sleep under the covers with it on!
Those two sad nightgowns sat in my drawer for years and eventually made it into my sewing room where I was going to dismantle them and make something else out of them. I like the flannel a lot, and it's hard to find a good flannel at fabric stores right now, so I didn't want to give these away.
I took apart one of them but this red one remained a favorite cat bed for a long time in my sewing room. I'd look at it and think I should do something with it but then I'd see the cat hair and think I should wash it before I do anything and the cycle went on and on.
After making a couple of Rhapsody blouses and dresses by Love Notions this summer, I got it in my head that I needed to make these nightgowns into dresses and the Rhapsody would be my pathway. There are so many options with the Rhapsody. I have a couple of tops that I made iwth sleeves of my own doing, a couple have ties and a couple don't.I also took the top of the Rhapsody and wanted a tiered dress so I found a pattern that had the measurements for tiers and I went crazy. There's a pink and white striped seersucker dress around here somewhere that makes me feel like I look like a cupcake but I love it.
I like the length of the Rhapsody dress but I don't like elastic at my waist. I'm so short in my torso that anything at my actual waist makes me look even shorter, so I hunted for a pattern that I already have that had the right shape and length, without an elastic.
When I was a pattern tester for 5 out of 4 patterns, I tested the Savannah in the dress length which had the exact waist shape I wanted. The two patterns are similar but the Savannah has a very difficult binding on the V and a dart, so the Rhapsody is easier, by far. They both have a yoke that is part of the armscye so I wondered if it was possible to start the Savannah shaping below the Rhapsody yoke.The picture shows the back view of the Savannah. On the back of both patterns, the yoke stops in the same place, so I just took the Savannah back, placed it alongside the Rhapsody back and made sure the part that goes into the armscye was the Rhapsody one and drew from there. It ended up narrower than the back for the Rhapsody which is what I wanted because I feel like my last top was very billowy in the back. I still gathered a very tiny bit but not as much as I normally would with the size I have been using.
On the front, I started right at the end of the armscye for the front on the Rhapsody and drew the Savannah on down. My last Rhapsody blouse made me wonder if I should go down a size, especially for the back. It's a very comfortable top, but it's not as shapely as it could be. I was a little worried that because the shaping at the waist is deeper on the Savannah, it might throw off the fit of the Rhapsody. And since I was adding the button placket and my math is sketchy, it is entirely possible that the whole thing would end up too tight.
When I made the flannel blouse, I had already taken apart the sleeves from the other nightgown, so I laid the sleeves out flat and cut the upper edge to match the upper edge of the sleeve for the Rhapsody. With this one, I didn't open up the seams on the sleeves because I didn't want to also interrupt the cuffs. I debated trying to finagle the upper edge of the sleeve so I could cut it to match the pattern and then I decided that since it's such a generous sleeve, surely I could make it fit.
I made sure to match up the side seams with the sleeve seams and keep the front going toward the front and the back toward the back. I think they went in pretty well.I am not much of a fan of big, luscious sleeves, and because this had been a nightgown, they sleeves had plenty of room. They are much more full than I would choose for a dress but I think they work just fine. And I was short on time the day I made this, so it saved a lot of steps not having to redo the sleeve seams and the cuffs.
I really like how this dress came out. I barely had enough to squeak out the dress length because the front of the nightgown had those pintucks and the button placket, so I didn't have as much fabric to work with as it seemed. The bottom of the side seams is less wide than my pattern pieces were but I actually like this width better so I didn't lose anything.
I ended up having enough fabric to make binding for the neckline and the hem. Because the hem is curved and I was short on time, I knew a deep hem was going to be a nightmare. People say making binding is a pain and I agree, but I think it was less aggravating to make the binding and sew it on than it would have been to fiddle with the curve of the hem.Tuesday, December 10, 2024
That One Time She Turned the Christmas Tree Around
Thursday, February 22, 2024
Not Modern Enough to Use Modern Conveniences
This is for all of you out there using something other than your hands to raise and lower the presser foot on your sewing machines.
I have two Bernina sewing machines and both have the option to insert a rod like this into that little hole on the front. This view is on my 1001 model but my newer 350 model has it as well. Both came with the knee lift rods. The bend in the rod allows it to go under your table so you can "simply" press your knee against it and it will raise and lower your presser foot, hands free. I say "simply" in quotes because I have no idea how simple it is to use.Confession: I've had my Bernina 1001 for almost 30 years and a newer 350 but I've always been afraid to use the knee lift. Why? Two very silly reasons. For one, I don't know how to use it and never bothered to look at a video. But mostly because I've always been afraid that I'd get so used to it, I wouldn't ever be able to use a sewing machine that didn't have this option, no matter how good the rest of the options might be.
Anyone else out there have this problem? You have access to a modern convenience that will make your life so much better but you won't use it in case you love it and can't live without it? I'm looking at you, backup cam in my car. I refused to use it in case I become so reliant on it, I can't back up the old fashioned way. This happens more than I'd like which is a great example of irony because the very crux of my job is technology and how it can be leveraged to improve things.
This must be a GenX problem, right?
Back to why I've called you all here.
The more I see people in their videos appearing to magically raise and lower presser feet without no hands, the more I wonder why on earth I have two machines that will do this and refuse to bother. Isn't this the kind of thing I would LOVE? I'm all about efficiency and surely the micro milliseconds I will save not moving my hand to raise and lower the presser foot will make my life so much better, right? So I keep thinking, I should really figure this out.
And I sat down to think about thinking about it and came up with a new dilemma. How does the knee lift work if you have a standing desk? When I upgraded my sewing space a few years ago, I left behind the old sit at a table thing and put in a counter where all of my machines live. The 350 is missing from this picture but it sits to the left of the 1001 most of the time. I stand or use the stool. When I'm quilting or trying to sew something unwieldy like these grain bags, I bring it to a table so I can spread everything out. At that table I do sit, but when I'm doing anything else, I'm at this counter. I don't think I can stand and press the knee lift and the way I have everything arranged, I'm not sure I can sit on the stool and use it either. I know I could just try it and see what happens but I also know that if I use it once and LOVE it and then find out I can't use it in my current set up, I'm going to be so mad and rethink everything about the set up I like so much.It's very complicated here in my brain when I'm having such first world dilemmas.
I'd love to hear from you if you use a knee lift system and especially if you use it with a standing desk or something similar to mine.
Tuesday, February 13, 2024
Not Your Average Grain Bag
A few years back, I learned how to make a bag from some kind of tutorial that had very specific dimensions in mind in the tutorial.
One thing led to another, and I realized you can make any size you want, make it as deep and wide as you want, add handles, etc. You can even add pockets inside or outside! That one takes some pre-thinking and I won't tell you how many times I didn't pre-think correctly and have had weird pockets in weird places.
I did correctly pre-think on this one and successfully incorporated the whale into my design. The inside pocket locations were questionable though.
I don't remember if the original had you make a lining, but it's as simple as making another bag with the same dimensions and then sewing the two together. This hides all of the seams and you get that fun experience of "birthing the bag" where you pull it all through so everything is right side out.
I made this tutorial to give everyone just a nugget of an idea. Once you get the concept, you'll be off and running!
My latest endeavor has been trying to find ways to upcycle grain bags from the barn. We have all of these grain bags from the enormous amounts of grain they eat, and most just get thrown away. I've seen a lot of people just wash them, cut them down a little bit, make handles from the parts they cut away and sell them as is.
I tried that but I didn't like the result. Too noisy and the handles were terrible. I didn't really trust their durability. I learned after making this bag with the fancy handles that webbing is really the best way to make durable straps for a bag. They last forever and I've been known to upcycle from one bag to another.
Fast forward to my overactive brain thinking I should quilt some batting scraps to the back of the grain bags and then line them. That quieted things down nicely and then I got creative with pockets and linings.